Who This Is For: This guide is for homeowners, renters, designers, and remodelers who want a dining chandelier to feel intimate and well-proportioned without blocking faces, creating glare, or hanging awkwardly high.
A dining chandelier should feel connected to the table, not stranded near the ceiling or hovering in front of everyone's face. The familiar height rule is useful, but it is only the first measurement. Ceiling height, fixture body size, table shape, seated sightlines, and the direction of the light can all move the final position by several inches.
The good news is that you do not need a complicated formula. Start with a proven range, mock up the lowest point, and judge the chandelier from the places where people will actually experience it: sitting at the table, entering the room, and standing at the table edge.

Quick Answer: Start 30 to 36 Inches Above the Table
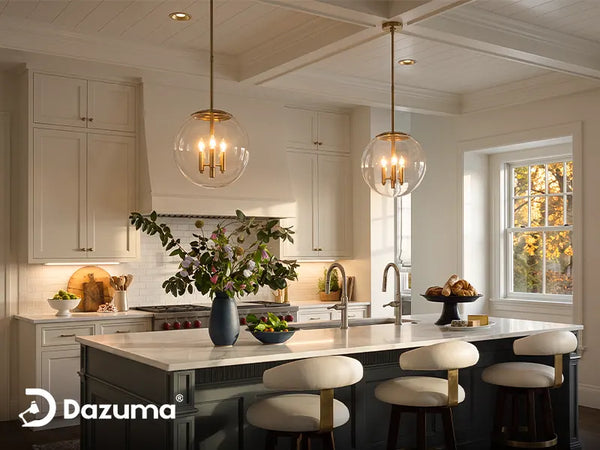
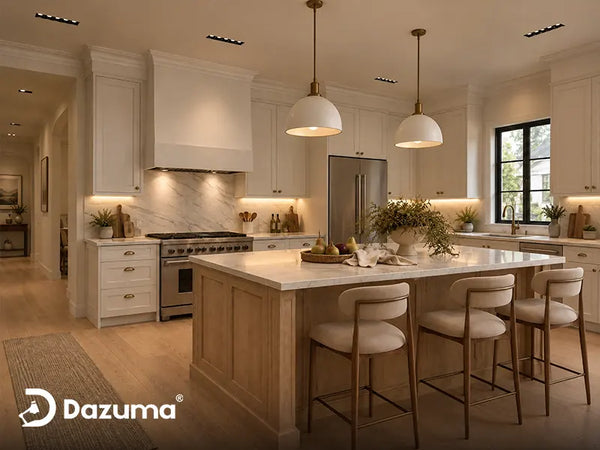
For an 8-foot ceiling, begin with the bottom of the chandelier approximately 30 to 36 inches above the tabletop. This range usually places the light low enough to anchor the dining area and high enough to preserve conversation across the table.
Measure to the fixture's lowest finished point. On a drum chandelier, that may be the bottom rim. On a crystal fixture, it may be the lowest drop. On a branching design, it may be a bulb, globe, arm, or decorative tip. Product listings sometimes emphasize the frame height while omitting the extra drop created by crystals or shades, so check the maximum assembled height.
Use 30 to 36 inches as a setup range, not a rule that overrides the room. A compact fixture may look best near 30 to 32 inches. A tall, dense, or visually heavy chandelier may need to move toward 34 to 36 inches. Your final test is whether the light defines the table without interrupting faces or feeling disconnected.
Dining Chandelier Height by Ceiling Height
A common adjustment is to raise the chandelier about 3 inches for each additional foot of ceiling height above 8 feet. The table below turns that idea into practical starting ranges.
| Ceiling Height | Starting Gap Above Table | What to Check |
|---|---|---|
| 8 feet | 30-36 inches | Fixture body must fit between table and ceiling without looking compressed. |
| 9 feet | 33-39 inches | Do not raise an undersized chandelier merely to emphasize the taller ceiling. |
| 10 feet | 36-42 inches | A larger or taller fixture may be needed to maintain visual connection. |
| 11-12 feet | About 39-48 inches | Treat the formula as a limit check; scale and sightlines matter more than arithmetic. |
The extra-3-inches guideline prevents a chandelier from looking unusually low in a tall room, but it can be overused. A chandelier that rises too far may lose its relationship with the table and light the room more like a general ceiling fixture. The taller the ceiling, the more important the chandelier's physical scale becomes. Often the right answer is a larger or taller fixture—not simply a longer empty gap above the table.

What About Vaulted or Sloped Ceilings?
Do not add height based on the highest point of a vaulted ceiling and automatically raise the chandelier several feet. The chandelier still belongs to the dining table. Start with the table-to-fixture relationship, then adjust upward enough to suit the room's volume and the suspension design.
On a slope, confirm that the canopy, adapter, chain, cable, or downrod is approved for that installation. A long chain can visually bridge a vaulted ceiling, while a rigid downrod system may have more specific slope and length limits.
Adjust the Height for Chandelier Size and Design
Two chandeliers can share the same listed diameter and feel completely different at the same height. An open ring, slim linear bar, or transparent glass design lets the room show through. A dark drum, dense crystal tier, or branching fixture with many shades occupies more of the sightline.
Tall or Visually Heavy Chandeliers
Move a tall or dense fixture toward the upper end of the range when its bottom tier feels close to diners or its body blocks too much of the opposite wall. Raising it 2 to 4 inches can improve openness without breaking its connection to the table. This is especially useful for layered crystal, deep drums, and chandeliers with opaque shades.
Airy, Transparent, or Minimal Chandeliers
An open design can often sit slightly lower because it preserves the view through the fixture. Still, transparent does not mean invisible. Reflections, exposed bulbs, metal arms, and glass edges can cross faces when viewed from a chair. Check the complete silhouette rather than judging only the central frame.
Exposed Bulbs and Downward Light
A chandelier can be physically out of the sightline and still create glare. Exposed bulbs may need lower output, frosting, shades, or a compatible dimmer. Downward-facing shades should spread light across the tabletop rather than create a harsh bright circle in the center. Hanging the fixture much higher is rarely the best fix for excessive brightness; improve the source and control first.
If you are comparing shapes and visual weight, browse the broader chandelier collection alongside modern chandeliers. Note the total body height, maximum assembled dimensions, and suspension range—not only the diameter shown in the product title.
Why the Lowest Point Matters
A chandelier with a 16-inch frame may finish several inches lower after shades, crystals, or hanging ornaments are installed. Measure the full assembled body before calculating chain or rod length. This prevents a common installation-day surprise: the frame seems correct, but one decorative element hangs directly in the line of sight.
When the product drawing lists minimum and maximum hanging height, confirm whether those numbers include the canopy and fixture body. Manufacturers do not all present dimensions in the same way.

How Table Shape Changes the Best Hanging Height
Round or Square Dining Tables
A single centered chandelier creates a clear visual axis over a round or square table. Because every chair faces the fixture from a different angle, sit in several positions before finalizing the height. Wide arms or low glass drops may feel harmless from the doorway but intrusive from a corner chair.
Rectangular Tables
A round chandelier can work over a rectangular table when it serves as a central focal point. For a long table, an elongated fixture usually gives more even visual coverage. Browse linear chandeliers when a single round fixture leaves both ends feeling dark or visually empty.
Height and length interact. A long, slim linear chandelier can often hang near the lower end of the normal range because it follows the table and blocks less vertical space. A deep rectangular cage may need to rise a little higher. Whatever the shape, keep it centered on the table rather than blindly centered on the room.
Extendable Tables
Plan around the table configuration used most days. If leaves are added only for holidays, the chandelier can remain centered over the everyday table. If extension changes the table's position rather than expanding equally at both ends, mark both layouts on the floor before deciding where the ceiling box belongs.
For more help pairing fixture dimensions with furniture, read how big a glass chandelier should be over a dining table. Size and height should be decided together: a small chandelier hung high looks lost, while an oversized one hung low can make the table feel crowded.
The Seated Sightline Test Is More Reliable Than a Formula
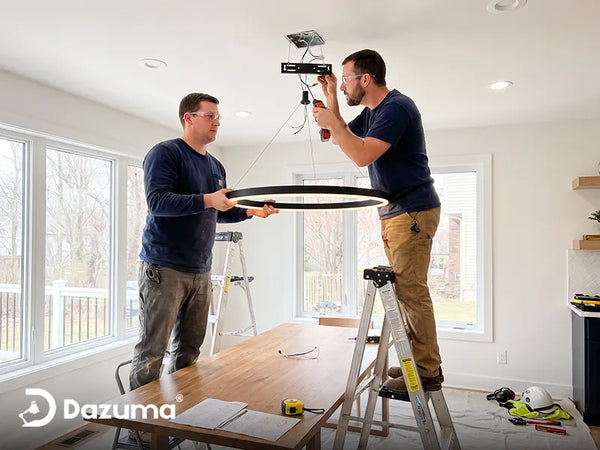
Before shortening a chain or cable, make a temporary marker at the proposed lowest point. Use painter's tape on a wall, hang a lightweight paper outline, or ask a helper to hold a measuring pole safely beside the table. Then sit in every chair.
- Can you see the face of the person opposite you without looking through a bright bulb or heavy frame?
- Does the chandelier feel close enough to belong to the table?
- Can a tall person stand from each chair without leaning toward the fixture?
- Does the light spread over the whole tabletop rather than only the center?
- From the doorway, does the chandelier frame the table instead of floating above it?
A useful new trick is to take phone photos from seated eye level and from the main doorway. A photo compresses the scene and makes a blocked face or oversized empty gap easier to notice. Test once during daylight and again after dark, because illuminated bulbs and reflective glass have much more visual weight at night.

Calculate the Finished Drop Before Installation
Work backward from the tabletop. If the table is 30 inches high and you want a 34-inch gap, the chandelier's lowest point will be approximately 64 inches above the floor. Subtract that number from the ceiling height to learn how much vertical space remains for the chandelier body, suspension, and canopy.
For an 8-foot ceiling, 96 inches minus 64 inches leaves 32 inches from the lowest point to the ceiling. A chandelier with a 24-inch body therefore has only about 8 inches left for the visible chain, rod, and canopy zone. That may work for one design and be impossible for another. This calculation explains why a beautiful tall chandelier can be the wrong choice even when its width is perfect.
Do not cut adjustable cable or fixture conductors to the final length before seeing the assembled chandelier in position. Leave a reversible adjustment when the design permits, then make the final change according to the manufacturer's instructions. For structural support, wiring, and safe mounting details, use the companion guide on how to install a chandelier.

Confirm Support Before Fine-Tuning Height
The ceiling box and its structural attachment must be suitable for the fixture's installed weight. Do not assume that a box holding a lightweight ceiling light can support a substantial chandelier. Heavy, fragile, high, or difficult-to-handle fixtures call for a qualified installer and safe lifting plan.
Hardwired installation also requires the circuit to be de-energized and verified before work begins. Height styling never takes priority over approved mounting hardware, manufacturer instructions, and applicable electrical requirements.
Common Chandelier Hanging Mistakes
Measuring From the Ceiling Instead of the Table
The table is the visual anchor. Measure upward from its finished surface to the lowest part of the chandelier. Ceiling-based measurements become unreliable when tables, fixture bodies, and ceiling heights differ.
Automatically Raising the Fixture in a Tall Room
The 3-inches-per-foot adjustment is a starting point. If the chandelier loses its relationship with the table, use a larger fixture or a longer body instead of creating more empty air below it.
Centering on the Room When the Table Is Off-Center
In most dining rooms, the chandelier should follow the table. This is particularly important in open plans where the architectural center of the dining zone may not match the center of the entire space. Review a range of dining room lighting only after confirming the actual furniture layout.
Fixing Glare by Hanging the Light Too High
Use appropriate bulbs, diffusers, shades, and compatible dimming. Raising a glaring chandelier may reduce discomfort at one angle while making the fixture look undersized and leaving the table poorly illuminated.
Trimming the Suspension Before the Final Test
Assemble, mock up, and test the lowest point before making irreversible cuts. A few spare chain links or an approved adjustable cable can save an expensive correction.
Final Advice
For an 8-foot ceiling, 30 to 36 inches above the tabletop is the right starting point for most dining chandeliers. Add roughly 3 inches for each extra foot of ceiling height, but let the table, fixture scale, light distribution, and seated sightlines make the final decision.
If two heights both seem plausible, begin slightly lower while the suspension is still adjustable. It is easier to raise a chain or cable after checking the room than to restore length that has already been cut. The best result is not the one that follows a formula most precisely—it is the one that lights dinner comfortably, keeps faces visible, and makes the table feel like the center of the room.