Who This Is For: This guide is for homeowners replacing exterior sconces or planning new wiring who want their outdoor wall lights to feel welcoming, illuminate useful areas, and look correctly proportioned—not too high, too low, or painfully bright at eye level.
Outdoor Wall Light Height Is About People, Architecture, and Glare
Most homeowners begin with one number: 66 or 72 inches. That is useful, but a 14-inch lantern, 22-inch vertical light, and shallow up-and-down fixture can share the same electrical box and still look completely different.
The goal is to keep useful light slightly above eye level while connecting the fixture to the door, garage, patio, or walkway. Start with the junction-box center, then check the complete body, beam direction, proportions, and standing or seated views.

Quick Answer: How High Should Outdoor Wall Lights Be?
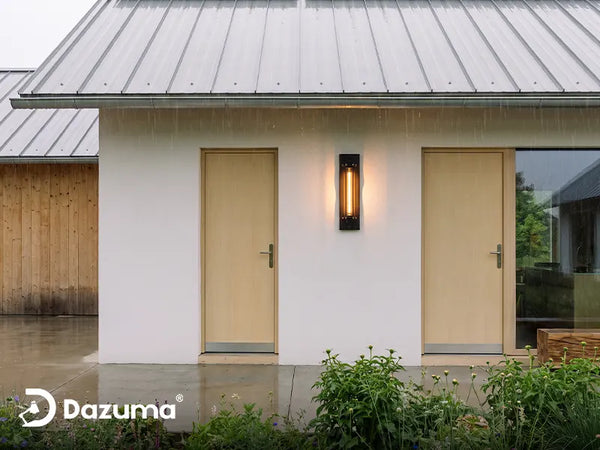
Beside a typical front door, start with the electrical-box or fixture center around 66 to 72 inches above the finished porch or landing—roughly 5.5 to 6 feet.
Then adjust for the actual fixture:
- Lower the center slightly when the light source is deeply shielded and the fixture is short.
- Raise it when an exposed bulb or bright lens would otherwise sit near eye level.
- Check that tall fixtures do not extend above the door head or below the lock area awkwardly.
- Keep paired lights at exactly the same center height, even when nearby trim is uneven.
- Measure from the finished surface—not unfinished grade, framing, or a future step.
A fixture roughly one-quarter to one-third of the door height is another useful sizing reference. Use that for scale, and the 66- to 72-inch range for placement.
What Part of the Fixture Should You Measure?
Use the Junction-Box Center as the Main Installation Reference
Electricians position the wall box by its center, while product dimensions describe the full body. Review the backplate drawing because some tall lights mount near the top rather than the middle.
Also Calculate the Highest and Lowest Points
An 18-inch light centered at 68 inches may extend from about 59 to 77 inches only when the mount is centered. Use the diagram to catch conflicts with trim, plaques, stone bands, or handrails.
Measure From the Finished Walking Surface
Measure from the finished surface where a person stands: the porch floor, landing, patio, or driveway apron—not an unfinished grade or lower planting bed.
Check the Brightest Visible Element
A correct center can still leave a clear bulb or bright lens at eye level. Check the approach, lock position, and lower step before approving the height.

Do Not Mark Only the Fixture Center
Transfer the complete silhouette to the wall with painter’s tape. A correct center can still produce an awkward top or bottom edge when the fixture is unusually tall.
How High Should Wall Lights Be Beside a Front Door?
Single Light Beside the Door
Start around 66 to 72 inches. Place a single fixture on the lock side when practical and leave enough space from the trim for the body to breathe.
Two Lights Flanking the Door
Keep paired centers perfectly level and use the door—not irregular stone or siding—as the main reference.
Extra-Tall or Two-Story Entry
A tall entrance may support a larger fixture and slightly higher center, but do not chase the roofline. The light still serves people at ground level.
Covered Porch With a Low Ceiling
On a covered porch, coordinate the sconce with the ceiling light and transom. The wall fixture can focus on faces and warmth rather than maximum output.
Browse Outdoor Porch Lighting by fixture height and light direction, and use the existing guide to the best places to install outdoor wall lights when planning the entire entrance rather than one isolated sconce.
A Tall Vertical Light for Modern Entries
A long vertical fixture can stretch a narrow wall beside a tall door. Start near standard sconce height, then tape the full 14.6-, 18.3-, or 22.2-inch body before final placement.

Vertical Scale With Soft Warm Refraction
Seeded Crystal Outdoor Wall Lighting Rectangular LED Light
Current Page Price: $192.99
Best for a modern front entrance, porch side wall, courtyard, or garden corridor where a tall fixture needs to relate to door height without exposing a bare bulb.
- Three body heights support different door and wall proportions.
- Bubble-textured crystal diffuses the warm integrated light.
- Single and multi-piece options support one- or two-sided entries.
How High Should Outdoor Wall Lights Be Around a Garage?
Side-Mounted Garage Lights
For garage-side sconces, start around 66 to 72 inches above the apron. Raise them only to clear trim or accommodate a tall body, and keep the source out of the windshield view.
Lights Between Two Garage Doors
On a center pier, align the height with the outer sconces. Choose a slimmer light instead of mounting a wide fixture too high.
Lights Above the Garage Door
Above-door lights depend on header height and beam direction. Use shielded downward light and check the open garage door for conflicts or reflections.
Measure From the Driveway Apron
On a sloped driveway, establish one level line from the garage architecture rather than measuring separately from the pavement.
Keep Garage Lights Level, Not “Level With the Slope”
On a sloped driveway, matching measurements from the pavement can leave the two lights visibly crooked. Align their centers to the garage opening and test the beams from an approaching vehicle.

Patio, Balcony, Walkway, and Side-Yard Heights
| Location | Starting Center Height | Main Check | Common Problem |
|---|---|---|---|
| Front Door | 66–72 inches | Face, lock, trim, and door proportion | Bright source at eye level |
| Garage Sides | 66–72 inches | Level alignment and driver glare | Following the driveway slope |
| Patio Standing Zone | 66–72 inches | Standing sightline and door clearance | Unshielded glare during conversation |
| Patio Seating Wall | 60–66 inches, then test seated view | Shade or LED hidden from chairs | Light source visible above the sofa |
| Side Walkway | 60–72 inches | Clear passage and wall illumination | Fixture projecting into a narrow path |
| Balcony | 66–72 inches | Seated glare and railing relationship | Light spilling into bedrooms |
These are design starting points. On patios, test from chairs and dining seats because a comfortable standing height can still glare when someone sits.
Long Corridors and Side Yards
In corridors, keep centers consistent. Projection matters as much as height because a deep fixture can become a shoulder hazard.
Pool and Outdoor Dining Walls
Near pools and dining areas, keep sources outside seated sightlines and check reflections from glass, water, and polished stone.
How Fixture Shape Changes the Best Height
Tall Vertical Fixtures
Long rectangular lights suit tall doors and narrow wall sections. Tape the full body; a very tall fixture may need a slightly lower center.
Lanterns With Visible Bulbs
Raise or shield lanterns when the bulb sits near eye level. Frosted bulbs or lower output may improve comfort without moving the box.
Up-and-Down Wall Lights
Up-and-down lights use the wall as part of the effect. A 60- to 72-inch center can work, but keep the wall above and below clear of trim, gutters, shelves, and plaques.
Wide Horizontal Fixtures
Center wide sculptural lights within the wall panel and check doors, shutters, downspouts, and handrails. Judge their height by both sightlines and beam pattern.
An Up-and-Down Light for Patios and Feature Walls
A horizontal wall washer works best on an uninterrupted wall. Test a 60- to 72-inch center, then adjust for seated glare and beam space.

Sculptural Wall Light for Open Vertical Surfaces
Wave Wall Sconce Outdoor Creative Up-Down LED Light
Current Page Price: $124.99 for two fixtures
Best for patio walls, balconies, corridors, garden walls, and modern exterior panels where the wall above and below the fixture is clear enough to display the beam pattern.
- Up-and-down output creates a decorative wall-light pattern.
- Black and white finishes suit different exterior palettes.
- Two-piece and larger sets support repeated corridor installations.
Compare other architectural effects in Up & Down Wall Lights and broader streamlined options in Modern Outdoor Wall Lighting.

Test the Beam Pattern With Furniture in Place
Patio chairs and sofas change the viewing angle. Install temporary power or use a mock-up so the bright LED remains hidden from seated guests.
Pairs, Spacing, and Visual Alignment
Align Paired Fixtures to One Level Line
Use a laser level. Uneven stone and sloped pavement can make equal tape measurements produce visibly uneven lights.
Coordinate With the Door or Garage Opening
Align fixture centers to the main door or garage opening, not unrelated nearby details.
Leave Breathing Room Around the Body
Leave breathing room around trim, shutters, gutters, columns, and corners. A slightly smaller correctly placed light is better than an oversized squeezed one.
Repeat Height Consistently Across the Facade
Door and garage lights may differ in size, but their visible centers should feel intentionally related.
What If the Junction Box Is Already Installed Too High or Too Low?
First, Compare the New Fixture’s Backplate
A taller backplate or offset mounting point may improve an existing box position. Review the dimension drawing first.
Change Fixture Proportion Before Accepting Poor Light
A downward-extending fixture may help a high box; a short shielded light may help a low one. Do not oversize a fixture only to hide wiring.
Move the Box When the Error Affects Safety or Use
Move the box when the source sits at eye level, conflicts with trim, or fails to light the landing. Use a qualified electrician for exterior wiring and sealing.
Do Not Cover Drainage or Mounting Details
Follow the required orientation and sealing instructions. Do not block drainage paths, gaskets, or weep openings.
For a broader installation sequence, consult Outdoor Wall Lights: Installing Guide Step by Steps.
A Realistic Front-Door Height Example
Imagine an 8-foot door, 9-foot porch ceiling, and two boxes centered 64 inches above the landing. The homeowners replace 12-inch lanterns with 22-inch vertical lights. If the mount is centered, each body extends roughly from 53 to 75 inches.
A taped mock-up shows the lower edge too close to the handle, so the boxes move up two inches. The same 64-inch box could work well for a shallow up-and-down light on a patio, proving that the fixture’s job matters as much as the number.
Common Outdoor Wall Light Height Mistakes
Measuring to the Top of the Fixture
Most height guidelines refer to the center or mounting point, not the top edge. Mixing references can shift the light by several inches.
Following the Slope of the Ground
Paired garage or entry lights should look level to the architecture. Measuring separately from sloped pavement often creates uneven centers.
Ignoring the Backplate Position
The box may not sit at the geometric center of the fixture. Always use the product’s mounting diagram.
Placing an Exposed Source at Eye Level
A beautiful fixture becomes unpleasant when guests can see a bare LED or bulb while approaching the door.
Mounting Too High for a “Grand” Look
High placement may disconnect the light from people and leave the lock area dim. Increase fixture size before raising it excessively.
Ignoring Seated Views on Patios
A light above standing eye level can still glare directly into someone seated nearby.
Letting Trim Interrupt Up-and-Down Beams
Gutters, shelves, stone bands, and overhangs can cut off the intended wall pattern.
Choosing Height Before Choosing the Fixture
Rough-in dimensions should reflect the actual body height, backplate, projection, and light direction—not a generic sconce placeholder.
Outdoor Wall Light Pre-Installation Checklist
- Measure from the finished porch, landing, patio, or driveway surface.
- Start around 66 to 72 inches to the junction-box or fixture center.
- Review the actual backplate and mounting-point drawing.
- Calculate the fixture’s final highest and lowest points.
- Compare fixture height with the door or opening proportion.
- Keep paired lights on one true level line.
- Check door, shutter, garage-door, and handrail clearance.
- Stand at the lock, approach path, driveway, and patio seating positions.
- Confirm bright LEDs or bulbs are not directly visible.
- Leave clear wall area for up-and-down beam patterns.
- Follow the manufacturer’s orientation and weather-sealing instructions.
- Use a qualified electrician when moving boxes or modifying exterior wiring.
Final Advice: Start With 66 to 72 Inches, Then Design the Whole Silhouette
For most front doors, garage sides, and standing patio areas, a center around 66 to 72 inches is a reliable starting point. The final answer depends on the complete body, source visibility, beam direction, and architecture.
Select the fixture first, tape its outline on the wall, and test the lock, street view, trim clearance, and patio seating. The best height follows the rule only after it solves the space.