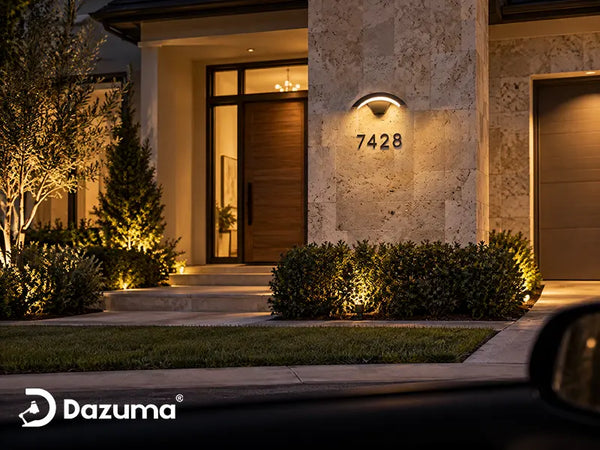
Who This Is For: This guide is for homeowners who want a more welcoming yard after dark without trenching for cable, but are unsure where solar lights will look intentional, charge reliably, and provide useful light.
Introduction
Solar lights are easy to place, which is exactly why many yards end up with too many of them. A row of bright dots along every edge can make a garden feel more like a runway than an outdoor room. The better approach is to decide what needs light, what deserves attention, and what should remain quiet and dark.
A successful layout also separates two questions that are often confused: where should the light appear, and where can the solar panel collect enough daylight? On an all-in-one fixture, those locations are the same. On a light with a remote panel, they can be several feet apart. That distinction can determine whether a fixture works for one hour or for most of the evening.

Quick Answer: How Should You Use Solar Lights in Landscaping?
Use solar lights in three layers. First, mark changes in direction or elevation so people can move through the yard comfortably. Second, add a small number of accent lights to trees, textured plants, stonework, or a water feature. Third, give seating areas a low, warm glow rather than flooding them with one harsh source.
Before fixing any location, place the lights temporarily and let them charge according to the manufacturer's instructions. Observe them after sunset, again a few hours later, and during cloudy weather. Move any fixture that creates glare, shines into a window, leaves a confusing gap, or fades earlier than you need. Solar lighting rewards testing because repositioning costs almost nothing.
Start With the Nighttime Job, Not the Fixture
Walk through the property after dark with a flashlight and make a short list of actual needs. Where do guests hesitate? Which step disappears in shadow? Is the house number hard to see? Does a beautiful tree vanish at night? These observations give every light a reason to exist.
Divide the list into three priorities:
- Navigation: Walkways, gates, turns, steps, and transitions between paving materials.
- Orientation: Entrances, driveway edges, house numbers, and the route from parking to the door.
- Atmosphere: Planting beds, tree canopies, fences, patios, sculptures, and water features.
Navigation comes first, but decorative solar lights should not be treated as the only safety lighting for a code-required stair, a pool edge, or a primary entrance. If dependable illumination is essential regardless of weather, use an appropriately rated wired system or another compliant light source for that task. Solar accents can support it rather than carry the full responsibility.

Make a Simple Night Map
Sketch the house, walkways, planting beds, stairs, and seating areas. Mark hazards with one symbol and features worth highlighting with another. This keeps the plan focused before you start comparing outdoor solar lights for different parts of the yard.
Check Sun Where the Solar Panel Will Sit
Solar panels convert daylight into electricity and store that energy in a battery for use after dark. Clouds, shade, dust, snow, shorter winter days, and nearby obstructions can all reduce the energy collected. There is no single number of charging hours that guarantees the same runtime for every fixture. Panel size, battery capacity, light output, operating mode, season, and local weather all matter.
Do a one-day shadow audit before choosing permanent positions. Check the proposed location in the morning, around noon, and in late afternoon. Remember that summer foliage can shade a panel that received full sun in early spring, while a roofline may cast a much longer shadow in winter. If you need a more detailed charging explanation, read Do Solar Lights Need Direct Sunlight?.
A remote solar panel is useful when the lighting target is shaded but a nearby fence top, post, or open bed receives better sun. Keep the panel free from leaf litter and do not place it where irrigation repeatedly coats it with mineral residue. Also watch for porch lights or streetlights shining directly onto the fixture's dusk sensor. Some sensors may interpret that light as daytime and delay or prevent activation.
Judge the Panel, Not Just the Beam
A spotlight can aim into a shaded bed while its panel faces an open patch of sky. If the panel is built into the fixture, you may need to change the lighting angle, choose another location, or accept a shorter winter runtime.

Where to Place Solar Lights in Each Landscape Zone
Walkways and Garden Paths
Place path lights near turns, intersections, steps, and changes in surface before filling the straight sections. A staggered arrangement usually feels more natural than matching pairs on both sides. Keep the light source below eye level and aim for overlapping pools of light on the walking surface, not bright points in a guest's line of sight.
For a narrow front walk, start with fewer fixtures than you think you need. Test them at night, then add one only where a dark gap makes the route unclear. Different solar path lights create very different beam widths, so the final spacing should be based on the visible pattern rather than the length of the walkway alone.
Trees, Shrubs, and Architectural Features
For a small ornamental tree, one light set outside the trunk flare can reveal both bark and lower canopy. Moving the fixture farther back generally spreads the beam; moving it closer creates stronger contrast and sharper shadows. A broad mature tree may need light from two directions, but start with one and assess the result from the main viewing area.
Use adjustable solar spotlights selectively. Aiming across textured stone or foliage can show depth, while aiming straight at a flat surface may look harsh. Avoid pointing beams into neighboring windows, toward drivers, or directly into the night sky.
Decks, Fences, and Outdoor Seating
On a deck, concentrate light near level changes, gates, and the route back to the house. Fence and railing lights work best when their glow lands on the surface below rather than projecting outward. At a seating area, warm and low-level light is usually more comfortable because it preserves the view beyond the patio and reduces glare on faces.
If a railing or gate already has regularly spaced posts, you do not have to light every one. Try every second or third post, then use brighter coverage only at stairs and access points. Solar post cap lights can provide rhythm and orientation, but restraint keeps the yard from looking visually busy.
Flower Beds and Low Planting
Hide small fixtures behind foliage edges while keeping their panels exposed. Light across grasses, seed heads, or broad leaves so the texture casts gentle shadows. Do not place a stake where expanding plants will cover the panel within a month, and leave room for routine pruning and mowing.
Solar Landscape Light Spacing: Useful Starting Points
Spacing depends on beam spread, output, mounting height, surface color, and how dark the surroundings are. The table below is a field-test starting point, not a promise that every fixture will cover the same distance.
| Landscape Area | Starting Approach | What to Check at Night |
|---|---|---|
| Straight walkway | About 6–8 feet apart, staggered | Continuous route without a runway effect |
| Curves and intersections | Place at the decision point first | The direction of travel is obvious |
| Small ornamental tree | One adjustable accent light | Canopy is visible without glare |
| Fence or railing | Every second or third post | Soft rhythm, brighter coverage at gates |
| Steps | Illuminate each elevation change | Tread edges are readable from both directions |
Measure from one useful pool of light to the next, not simply from stake to stake. Pale concrete reflects more light than dark mulch, and a fixture that looks bright in an empty yard may seem weaker after shrubs leaf out. For a larger property, build the overall hierarchy first using the steps in How to Plan Landscape Lighting Layout Step by Step.

Avoid the Runway Effect
Perfectly paired lights can overpower a residential path. Staggering the fixtures and emphasizing turns gives the route enough definition while allowing nearby planting to remain part of the scene.
Choose Light That Feels Comfortable Outdoors
For most residential gardens and patios, warm light around 2700K creates a calm appearance and works well with brick, wood, warm stone, and green foliage. A consistent color temperature across the visible yard matters more than chasing a precise number. Mixing icy blue path lights with amber wall lights can make an otherwise thoughtful layout feel accidental.
Shielding and aiming matter just as much as color. The best-looking source is often one you barely notice. Direct light onto the path, trunk, wall, or planting rather than into the eye. Use the lowest output that completes the task, and leave some darker areas between focal points. Darkness gives the lit areas depth and helps preserve the view of the night sky.
Install and Test Before You Commit
- Bench-test each fixture. Remove any battery tab, switch the unit on, and follow its initial charging instructions. Confirm that the dusk sensor and available modes work.
- Mark temporary positions. Set fixtures on the ground or use removable markers. Do not drill into masonry or drive every stake fully into compacted soil yet.
- Prepare hard ground. Moisten dry soil and make a pilot hole with an appropriate tool. Pushing on the solar panel or fixture head can crack the housing or bend the stake.
- Aim after sunset. View the light from the street, entry, main rooms, patio seats, and both directions of travel. Correct glare and distracting reflections.
- Test the late evening. A layout that looks good at dusk may have several weak fixtures by bedtime. Recheck after the runtime you actually need.
- Observe more than one day. A sunny-day test shows the best case. A cloudy day and a shorter winter day reveal whether the location is dependable enough.
Use a Temporary Layout Night
Invite someone unfamiliar with the yard to walk from the driveway to the door. Notice where they slow down or look toward the ground. That simple test often identifies a missing transition light more reliably than viewing the yard from one window.

Seasonal Care for More Reliable Solar Lighting
Solar fixtures are low-wiring, not no-maintenance. Wipe the panel with a soft damp cloth when pollen, dust, bird droppings, or mineral residue reduce its exposure. Clear leaves and snow without scraping the panel, and trim new growth that creates afternoon shade. Check seals and housings after severe weather, following the manufacturer's care directions.
Runtime normally changes with the season because daylight duration, sun angle, temperature, and cloud cover change. A light that lasts well into the night in June may switch off earlier in December. If performance declines suddenly, test the fixture in a sunnier location before assuming it has failed. If it works there, the original location is the problem. If it remains weak after a full charge, the battery may be nearing the end of its service life. Replace it only with the type and rating specified by the manufacturer.
Quick Troubleshooting Order
- Confirm the switch is on and any shipping tab is removed.
- Clean the panel and verify that it receives daylight.
- Move the fixture away from nighttime light hitting its sensor.
- Charge and test it in an open, sunny location.
- Check the manual for battery replacement or warranty guidance.
Common Solar Landscaping Mistakes
- Lighting every border: Outlining the lawn, driveway, path, beds, and fence at once creates visual clutter. Choose the routes and features that matter.
- Ignoring seasonal shade: A panel placed beneath a bare spring tree may be covered by dense leaves in summer.
- Using equal brightness everywhere: Navigation lighting should be clear, while decorative layers can remain softer. A focal point needs contrast to read as a focal point.
- Aiming toward people: A bright diode in direct view can reduce visibility even when it adds more light. Re-aim or shield it so the beam reaches the surface.
- Expecting solar accents to solve every safety task: Weather-dependent decorative lights are not a substitute for required, dependable illumination at critical hazards.
- Skipping the late-night check: Dusk performance does not tell you whether the battery will cover the hours when you use the yard.

Let Darkness Do Some of the Design Work
A yard feels deeper when every surface is not equally bright. Use a clear route, one or two visual anchors, and soft edges. The eye will connect those points without needing a light at every foot.
Final Advice
The most useful rule is simple: place solar lights by nighttime purpose, then validate each panel location in daylight. Start with hazards and decisions along the route. Add a few focal points. Keep the color warm and consistent. Aim the light at surfaces, not eyes, and test the layout after the evening has been dark for several hours.
Do not judge the whole system by its first night. Give new fixtures the recommended initial charge, observe changing shadows, and expect shorter performance during less favorable seasons. A flexible layout that can be adjusted as plants grow will usually look better and work longer than a rigid line of evenly spaced stakes.