Who This Is For: This guide is for homeowners considering solar lights for a shaded yard, covered porch, cloudy climate, fence line, walkway, or garden—and anyone whose existing lights look bright after sunny days but fade early after poor weather.
Introduction
Solar lights can charge without a perfectly clear sky, but that does not mean every shaded location will produce a useful result. The panel needs daylight, and the amount of energy it collects changes with sun angle, clouds, tree cover, nearby buildings, season, dirt on the panel, and the fixture’s own electronics and battery.
That distinction matters because “it turns on” and “it performs the way you need” are different standards. A small decorative glow beside a flower bed may still feel worthwhile after a partly cloudy day. A light expected to illuminate a gate, stair, or main entry for the entire evening needs a much more dependable charging location.

The honest way to plan Outdoor Solar Lights is to match the charging conditions to the job. This guide explains what indirect light can and cannot do, how to test a location before permanent mounting, and when a wired alternative is the more practical choice.
Quick Answer: Do Solar Lights Need Direct Sunlight?
No, solar lights do not always need direct sunlight to collect some energy. Bright indirect daylight and cloudy daylight can still reach a photovoltaic panel. However, direct, unobstructed sun usually provides the strongest and most reliable charge. As available solar energy drops, the light may turn on later, appear dimmer, step down to a lower mode, or shut off earlier—depending on how that particular fixture manages its battery.
Partial shade can work for decorative or secondary lighting if the panel still receives a meaningful window of sun. Deep shade beneath dense evergreen branches, a porch roof, or a narrow passage between buildings is much less dependable. In those spaces, a remote solar panel placed in a sunnier area, a low-voltage system, or another suitable power source may make more sense.
Do not rely on a universal promise such as “six hours of sun equals ten hours of light.” Panel size, battery capacity, LED power, operating mode, temperature, battery age, and control settings vary by product. Treat the manufacturer’s runtime as a product-specific best-case reference, then evaluate your own site.
How Outdoor Solar Lights Charge
A typical outdoor solar light combines a small photovoltaic panel, charging electronics, a rechargeable battery, an LED, and a light sensor or controller. During the day, the panel converts available light into electrical energy and the battery stores it. After the controller detects darkness, the battery supplies the LED.
The important input is solar irradiance—the light energy reaching the panel—not outdoor heat. A hot panel in shade is not receiving the same usable energy as a panel in bright sun. Likewise, a cool, clear day may be an excellent charging day. This is why judging a location by temperature or by how bright it looks to your eyes can be misleading.
Direct Sunlight Provides the Most Charging Energy
A panel with a clear view of the sun generally collects more energy than the same panel under a tree or roof. Direct exposure is especially valuable when the fixture runs at higher brightness, stays on continuously, or must perform through a long winter evening. The panel should face open sky without nearby leaves, eaves, posts, or decorative caps casting a shadow across it during the strongest part of the day.
Panel orientation matters, but there is no single compass rule that replaces a site check. The best direction and tilt depend on latitude, season, rooflines, trees, and when shadows cross the property. An adjustable panel is useful because you can aim it for daylight separately from the lamp’s beam.

Bright Indirect Light Can Still Charge the Battery
A bright open-sky location may receive useful diffuse light even when clouds block direct sun. A fixture can also charge during hours when the sun is not striking the panel head-on. The tradeoff is usually a smaller energy harvest, so performance may be less consistent from one day to the next.
One afternoon observation is not enough. A spot that looks sunny at 9 a.m. may fall under the house shadow by noon, while a location that starts shaded may receive several strong hours later. Watch the proposed location at multiple times before mounting the light.
Deep Shade Is the Most Difficult Condition
Deep shade is not simply “no visible sunbeam.” It is a location where dense foliage, a roof, or surrounding structures block much of the sky for most of the day. A light there may collect enough energy to flash on, but not enough to deliver useful brightness or runtime.
The best workaround is often to separate the light location from the charging location. Some fixtures use a detached panel connected to the lamp by a cable, allowing the lamp to sit near a shaded gate or tree while the panel occupies a sunnier clearing. Check the actual product design and allowed cable routing rather than assuming every solar fixture supports this arrangement.
Sunlight Conditions and Realistic Results
This table intentionally avoids fixed percentages and guaranteed hours. Those numbers cannot be applied reliably across different products. Use the table to set expectations, then test the actual fixture in the intended position.
| Daylight Condition | Charging Outlook | Best Use | What to Check |
|---|---|---|---|
| Several hours of clear, direct sun | Best chance of a full charge | Primary path, post, wall, or accent lighting | Late-day shadows and panel angle |
| Direct sun for part of the day | Often workable, product dependent | Secondary routes and decorative zones | Whether the sunny window changes by season |
| Bright overcast or open-sky shade | Charging occurs but may be reduced | Low-output accents with flexible expectations | Runtime after several cloudy days |
| Shade beneath light, seasonal foliage | Variable through the year | Movable or easily re-aimed fixtures | Leaf growth and winter sun angle |
| Deep shade under roof or dense canopy | Usually unreliable | Remote-panel systems or another power source | Whether the panel can move to open sun |
How Much Sun Do Solar Lights Need?
Many solar-light instructions specify a recommended charging period, but that recommendation belongs to the individual product. Use it when comparing fixtures, then ask whether your intended location can realistically provide that exposure. A small integrated panel under a porch roof and a larger detached panel in an open yard should not be expected to behave the same way.
Measure the Useful Sun Window, Not Just Day Length
“The sun is up for fourteen hours” does not mean the panel receives fourteen hours of useful charging light. A fence may shade it all morning, a maple may cover it at midday, and the house may block the late-afternoon sun. Track the actual panel position at morning, midday, and late afternoon. A phone photo taken from the same spot at each time makes the shadow pattern easy to compare.
Then test the light for several nights, including at least one cloudy day if possible. Note when it turns on, whether the brightness changes, and whether it lasts until the time you need it. This simple test is more informative than guessing from the yard’s general brightness.
Expect Seasonal Performance to Change
Winter combines shorter days, lower sun angles, longer nights, and—in many regions—more cloud cover. Summer foliage can create shade that was absent when you installed a light in early spring. Snow, pollen, dust, fallen leaves, and irrigation residue can also cover the panel. A location that performs well in one season may need an angle adjustment, pruning, cleaning, or a different mode later.
If reliable all-night operation is essential on a main walkway, compare solar with a powered system before committing. The practical breakdown in Low Voltage vs Solar Path Lights for Front Walkways can help you decide which tradeoff fits the route.
Placement Guide for Common Solar Light Types
Solar placement always involves two targets: the panel needs daylight, while the lamp needs to illuminate a useful surface. Integrated fixtures force both targets into one position. Fixtures with independently adjustable or detached panels give you more freedom.
Solar Path Lights
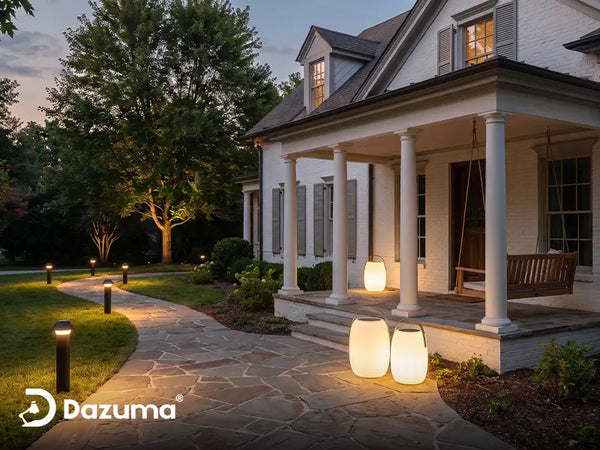
Place Solar Path Lights where the panel can see open sky and the light can guide a real decision point: a curve, step, gate, intersection, or transition from driveway to walkway. Avoid pushing every fixture beneath dense shrubs simply to hide the hardware.
For a partly shaded path, prioritize the sunniest positions first rather than forcing perfectly even spacing. A staggered arrangement can look intentional while giving more panels usable exposure. Treat small solar path lights as guidance or ambiance unless testing proves they provide the visibility your route requires.


Solar Wall, Fence, and Post Lights
An integrated wall light mounted beneath a deep eave may receive less daylight than expected. Before drilling, hold the fixture at the planned height and observe the panel’s sky view. A slightly different wall, gate post, or mounting height may improve exposure without changing the nighttime purpose.
For entries and side passages, Solar Outdoor Wall Lights can be useful where wiring is difficult, but they should not be mounted where another bright porch or street light confuses the dusk sensor. Post-top panels often have a wider sky view, though overhanging trees and decorative caps can still cast shade.
Solar Spotlights for Trees and Architecture
The best beam angle is not always the best charging angle. A light aimed north toward a tree may need its panel aimed toward a clearer part of the sky. Choose an independently adjustable design when the subject sits in shade but a sunny panel position is nearby.
A Solar Spotlight usually asks more from its battery than a tiny marker light, especially in a high-output mode. Test it after ordinary weather, not only after a perfect sunny day. If you want ideas for matching solar fixture types to boundaries, walls, and ground-level guidance, see Best Garden Solar Lights That Actually Work at Night.

Why Solar Lights Fade Early
If a light once performed well and now shuts off early, do not assume shade is the only cause. Work through the system in a simple order:
- Clean the panel. Use the care method in the product instructions. Dust, pollen, leaves, mineral residue, or snow can reduce the light reaching the cells.
- Look for new shadows. Plant growth, seasonal sun movement, new furniture, fencing, or even a moved planter can change exposure.
- Confirm the switch and mode. Some lights have shipping tabs, power switches, motion modes, brightness levels, or setup steps that change runtime.
- Check the night sensor. Nearby artificial light can delay activation or keep some fixtures from recognizing darkness.
- Test in a sunnier location. Move the light—or only the panel, if detachable—to open sun for the charging period stated by the manufacturer. Better performance there points to a placement problem.
- Consider battery age and temperature. Rechargeable batteries lose capacity over time, and extreme temperatures can affect operation. Replace only with the battery type and procedure allowed by the manufacturer.
Also compare all lights in the same set. If every fixture fades early, recent weather or seasonal exposure may be responsible. If only one performs poorly in the same conditions, that unit may have a dirty panel, weak battery, bad connection, sensor issue, or component fault.
Solar Light Buying Checklist
Choose a fixture for the actual daylight available, not the daytime appearance of the lamp alone. Before purchasing, check:
- Panel arrangement: integrated, independently adjustable, or detached.
- Manufacturer charging guidance: the recommended conditions and charging time.
- Operating modes: steady, dimmed, motion-activated, or scheduled behavior.
- Stated runtime: and the conditions under which the claim applies.
- Battery information: type, capacity if listed, and whether replacement is permitted.
- Outdoor suitability: the product’s stated location and exposure rating for rain, sprinklers, or other conditions.
- Maintenance access: whether you can clean the panel, operate switches, and reach the battery compartment if serviceable.
- Nighttime job: decorative glow, orientation, path guidance, or a more demanding security task.
A useful insight is to budget sunlight the way you budget brightness. Higher output and longer operation require more stored energy. If a location offers limited charging light, a lower mode, motion activation, larger panel, or shorter desired runtime may be a better match than simply buying a brighter lamp.
Final Advice
Solar lights do not require an uninterrupted beam of direct sun every minute of the day, but they do need enough usable daylight to replenish the energy they spend at night. Direct sun gives the most dependable result. Bright indirect light may be adequate for modest decorative tasks. Deep, persistent shade usually calls for a remote panel or a different power source.
Before permanent installation, observe the panel location at several times of day, test the fixture through ordinary weather, and judge it at the hour you actually need the light. That small trial will tell you more than a generic runtime promise—and it can prevent a beautiful solar fixture from ending up in a place where it never had a fair chance to work.