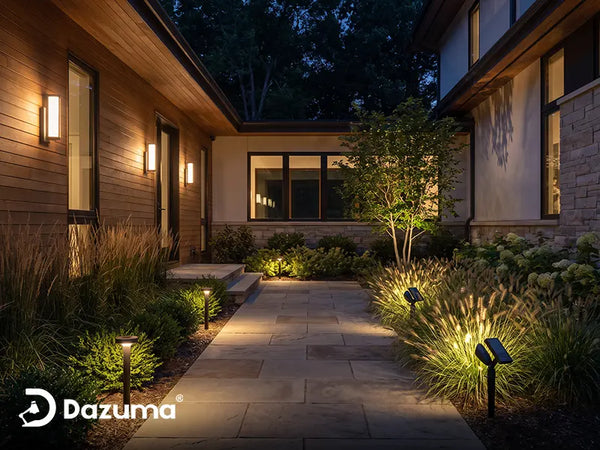
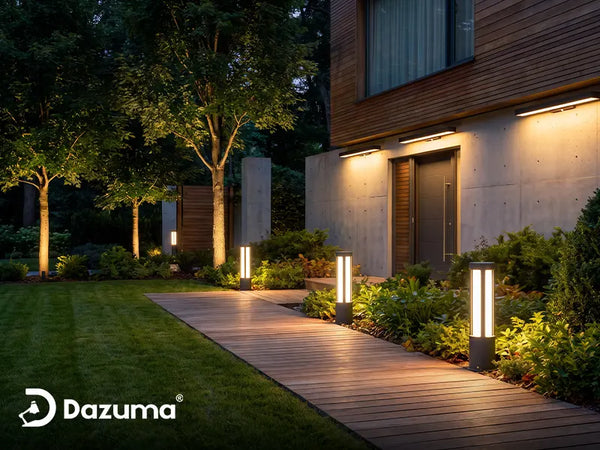
Who This Is For: This guide is for homeowners who want to see the driveway edge, garage, vehicles, and path to the front door clearly at night—without staring into a painfully bright floodlight or shining unwanted light into bedrooms and neighboring homes.
Driveway Lighting Should Help Your Eyes, Not Challenge Them
A driveway feels dark, so a homeowner installs one powerful garage light. The pavement becomes brighter, but arriving drivers now see a brilliant source directly ahead. The garage door is obvious while the driveway edge, a bicycle, a trash bin, or a person approaching from the side may become harder to notice.
Useful visibility is not maximum brightness. Put moderate light on the surfaces and boundaries the driver needs to see while keeping the bright source outside the direct line of sight. Good driveway lighting is a system that identifies the entrance, edges, curves, stopping zone, and walking route.

Quick Answer: How Do You Light a Driveway Without Glare?
Use several low- to moderate-output fixtures for specific jobs instead of one exposed floodlight. Aim light downward or toward a defined surface, shield the source, and place fixtures beside the route rather than directly in front of it.
A practical low-glare layout usually includes:
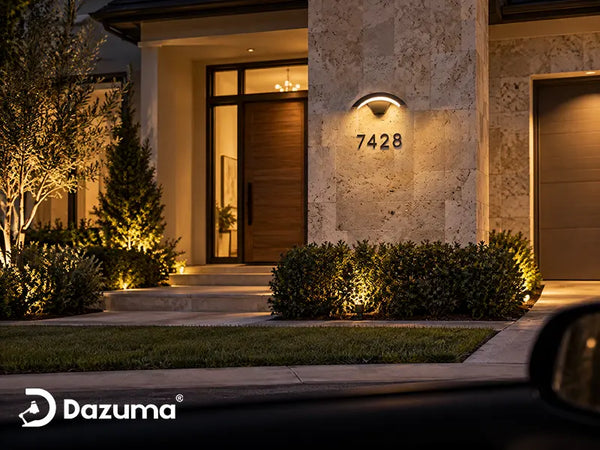
- A visible but softly illuminated entrance or address marker.
- Low path or bollard lighting at curves, edges, and changes in grade.
- Shielded wall lighting near the garage and pedestrian door.
- Separate guidance light along the walk from the driveway to the house.
- Motion or timed boost lighting only where brighter temporary light is useful.
- Warm or neutral-warm light rather than unnecessarily cool, blue-white light.
Test at driver eye level. If the bare LED, bulb, or bright lens is visible from the street, change its position, output, shielding, or aim.
Why a Brighter Driveway Can Be Harder to See
The Light Source Is Brighter Than the Scene
When an exposed garage floodlight dominates the view, darker objects beside it lose definition—especially while backing out, turning from a dark street, or approaching in rain.
The Fixture Sits in the Driver’s Line of Sight
A high garage light or low unshielded entrance light can face the vehicle directly. Light entering the eye does not necessarily help illuminate pavement.
The Driveway Has Large Bright and Dark Patches
A narrow beam can create a brilliant circle followed by darkness. Gentle overlap between lower-output fixtures is easier to read than isolated intense pools.
Polished or Wet Surfaces Reflect the Beam
Wet concrete, sealed pavers, snow, and glossy garage doors can reflect light toward the driver. Lower output and a controlled downward angle often improve comfort.

Test From Inside the Car
Walk-around inspections are not enough. Sit in the driver’s seat at the street, the driveway entrance, the curve, and the garage stopping point. Glare often appears only from those lower viewing angles.
Plan Around the Actual Driving Route
Mark Where the Driver Must Make a Decision
A straight driveway does not need equal illumination. Prioritize the entrance, curves, narrowing points, slopes, gates, retaining walls, stopping zone, and vehicle exit area.
Identify Side Hazards
Bins, hoops, low walls, drainage edges, bicycles, and planting beds often sit outside the garage beam. Light the boundary or background so these objects become recognizable.
Separate Driving Light From Walking Light
After parking, the route to the door may sit behind the vehicle in shadow. Give that path its own low pedestrian-scale lighting.
Check Both Arrival and Departure
A comfortable arrival light may glare in a mirror while backing out. Test both directions, side mirrors, and the rear view.
The existing guide How to Plan Driveway Lighting? provides a broader planning overview; the sections below focus specifically on reducing glare.
Best Lighting Method for Each Driveway Zone
| Driveway Zone | Useful Lighting Approach | What the Driver Should See | Avoid |
|---|---|---|---|
| Street Entrance | Shielded address light, low marker, or illuminated planting | Where to turn and where the pavement begins | A bright fixture facing traffic |
| Straight Edge | Sparse low path or bollard lights | The boundary between pavement and landscape | Continuous runway-style rows on both sides |
| Curve or Slope | Additional low shielded light on the outside edge | Direction, grade, and retaining features | An uplight aimed toward the approaching windshield |
| Garage Apron | Shielded wall lights or downward garage lighting | Door, parked vehicles, and stopping space | One exposed high-output floodlight |
| Walk to the House | Path lights, step lights, or low wall lighting | Walking surface, steps, and door location | Depending on vehicle headlights or garage spill |
| Side Boundary | Light a fence, hedge, or wall softly | Depth and edge location | A bare fixture at driver eye level |
Use Path Lights where continuous pedestrian guidance matters. Use Bollard Lights selectively where a taller visual marker is helpful, such as a long edge, curve, or gate. Neither category needs to form a perfectly even row around the entire driveway.
Define the Outside of a Curve
Drivers naturally look toward the direction of travel. Low shielded fixtures on the outer edge of a curve can show its shape without placing bright sources in the center of the windshield view.

Fixture Height, Aiming, and Shielding
Keep Low Fixtures Below Normal Eye Level
Path lights and bollards should illuminate the ground or edge while concealing the LED. A short fixture with a visible lens can glare more than a taller, well-shielded one.
Aim Garage Lights Down, Not Out
Garage wall lights should illuminate the apron, door, and side approach. Strong horizontal light is more likely to enter a driver’s eyes or nearby windows.
Use Architecture as a Shield
Use eaves, columns, walls, deep shades, louvers, or integrated shields to hide the source without blocking the useful beam.
Do Not Aim Uplights Across the Driveway
An accent beam aimed across pavement may intersect the vehicle path. Keep fixtures on the feature side or make the beam end before the lane.
Check Upper-Floor Windows
Downward light can still reflect into an upper bedroom. Test indoors with curtains open before finalizing the aim.
For garage and side-door fixtures, browse Outdoor Wall Lighting by shielding and light direction rather than by brightness alone. The guide on how to avoid glare from outdoor wall lights explains the same issue at entrances and patios.
Brightness and Color Temperature: Start Lower Than You Think
Use Contrast Carefully
Moderate light makes an edge readable through contrast. Maximum output everywhere removes hierarchy and can make the driveway look commercial.
Choose Warm or Neutral-Warm Light
For most homes, 2700K to 3000K feels comfortable on brick, wood, stone, plants, and paving. Very cool light appears more conspicuous against a dark neighborhood.
Keep the Garage From Becoming the Only Bright Object
If the garage is bright and the route is dark, reduce garage output and add gentle edge or transition light.
Do Not Select by Wattage Alone
LED wattage does not reveal beam shape, shielding, or useful pavement light. Compare the complete system.

Wet Pavement, Snow, and Reflective Surfaces
Test After Rain
A comfortable dry-surface aim may reflect badly when wet. Evaluate the driveway after rain before finalizing output and tilt.
Use Lower Angles Carefully
Shallow light across glossy pavement can reflect toward the windshield. Steeper downward distribution and shielding keep light on the driveway.
Snow Can Multiply Apparent Brightness
Snow can make normal output feel much brighter. Dimming or seasonal schedules help maintain comfort.
Watch Pale Garage Doors and Metal Gates
A white garage door or glossy gate can become a large luminous surface. Light the apron and door gently instead of flooding the whole surface.
Motion Sensors, Timers, and Dusk-to-Dawn Controls
Use a Low Background Level and a Temporary Boost
Keep gentle entrance and edge lighting on during arrival hours, then use motion activation for a temporary garage or side-door boost.
Aim Sensors Away From the Street
Aim the sensor so it activates inside the driveway, not for every passing vehicle, pedestrian, or moving branch.
Avoid a Sudden Full-Brightness Flash in the Driver’s Face
Motion activation can be startling when the fixture faces the vehicle. Aim it toward pavement or a wall and use shielding.
Keep Controls Understandable
Keep dusk-to-dawn, motion, timer, and override functions simple and label switches when necessary.
Compare controlled garage and entry options in Motion Sensor Wall Lights, but confirm the sensor range and light direction fit the actual driveway.

Control When Bright Light Appears
Brighter light is useful while parking, unloading groceries, or checking the garage. It does not need to dominate the property from dusk until dawn.
A Realistic Driveway Lighting Fix
Consider a home with a 55-foot driveway, two-car garage, narrow planting strip, and a walkway beginning behind the passenger side. One bright dual-head garage light shines through the windshield. The door is bright, the dark trash bin disappears at the edge, and the parked vehicle blocks light from the walkway.
The garage light is re-aimed downward and reduced so it illuminates the apron without facing the street. Two shielded low fixtures mark the entrance and walkway start. A third reveals the opposite retaining edge without creating a symmetrical runway, and a path light guides passengers to the door.
The garage light stays low during arrival hours and brightens temporarily with motion. After rain reveals one reflection, the homeowners tilt that fixture downward and move it slightly into the planting bed. The result is not dramatically brighter; it is easier to understand from the driver’s seat.
Common Driveway Lighting Mistakes
Installing One Extremely Bright Garage Floodlight
This produces a bright destination and a dark route while placing the source in the arriving driver’s view.
Creating a Runway With Identical Lights
Perfect rows on both sides can feel commercial and introduce many visible sources. Mark important edges and decisions rather than every few feet.
Using Uplights Beside the Driving Lane
Even a small uplight can shine into a windshield or side mirror. Keep accent beams away from the vehicle path.
Lighting Only the Garage, Not the Walkway
Once vehicles are parked, they may block the route to the house. Give pedestrians their own low-level guidance.
Aiming Motion Lights Toward the Street
This creates frequent false triggers and can flash directly at arriving drivers or passersby.
Choosing Cool White Because It Looks “Brighter”
A more conspicuous blue-white source may feel harsher without providing better placement or visibility.
Testing Only While Standing
Driver eye level is lower, and mirrors introduce additional glare angles. Test from the vehicle in both directions.
Ignoring Neighbors and Upper Windows
Light that stays within the driveway at ground level may still enter a neighboring or second-floor window.
Nighttime Driveway Lighting Test Checklist
- Drive toward the house from the normal street approach.
- Confirm the driveway entrance is recognizable without a visible bright source.
- Check edges, curves, slopes, gates, bins, walls, and parked objects.
- Test the view while backing out and through both side mirrors.
- Stand on the walkway after parking and confirm the route to the door is visible.
- Look from bedrooms and adjacent properties for light intrusion.
- Check whether any bare LED, bulb, or lens is visible at driver eye level.
- Test motion activation from the driveway—not from passing street traffic.
- Evaluate the system on wet pavement when possible.
- Reduce brightness before adding another fixture.
- Re-aim any beam that crosses the driving path or continues into open sky.
- Confirm switches, timers, and sensor overrides are easy to understand.
Final Advice: Light the Information a Driver Needs
A driver needs to recognize the entrance, edge, direction, grade, stopping zone, obstacles, and walking route—not see every square foot at equal brightness.
Use shielding, lower positions, downward distribution, warm light, and separate layers. When the driveway still feels uncomfortable, sit in the car and identify what is missing before adding lumens. The answer is often a visible edge, better garage aim, or dedicated path light—not a larger floodlight.