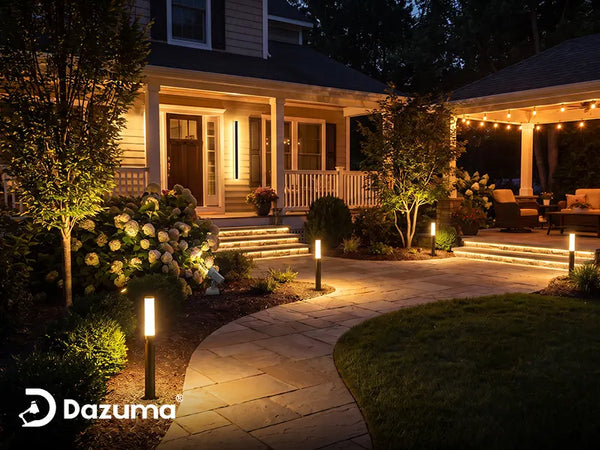
Who This Is For: This guide is for homeowners who want a garden path to feel safe and welcoming after dark without turning it into a runway. It is especially useful for curved walkways, front garden paths, side-yard routes, villa courtyards, and landscaped paths where the lights should support the garden instead of becoming the main thing you notice.
Quick Answer
To light a garden path without overdoing it, illuminate the places where people make decisions: the beginning of the path, curves, intersections, steps, gates, and changes in surface. Leave some darker space between those points. You do not need a fixture beside every paving stone or on both sides of the path at equal intervals.
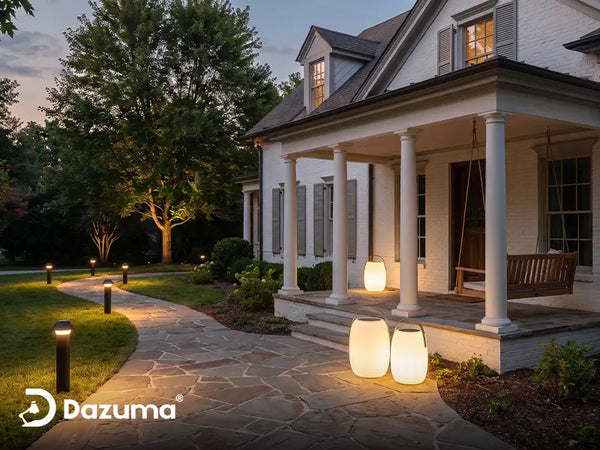
A good starting approach is to stagger fixtures from side to side and judge the overlapping pools of light on the ground, not the distance between lamp posts alone. Taller shielded path lights can cover a wider section with fewer fixtures. Shorter, brighter bollards should usually be spaced more carefully so their visible sources do not dominate the view.
Warm white light around 3000K is a dependable choice for residential paths because it works naturally with plants, wood, brick, gravel, and stone. Browse Path Lights by beam shape, mounting height, and output rather than buying a large quantity of identical fixtures before testing the first few positions.

What Overlighting a Garden Path Looks Like
Overlighting is not only about high wattage. A path can feel overdone because there are too many fixtures, because every lamp is visible at once, or because the spacing is so rigid that the garden starts to resemble a commercial walkway. Even modest lights can create visual clutter when they are installed in a perfectly repeated line.
The Runway Effect
The runway effect happens when fixtures are placed directly opposite each other on both sides of the path or repeated at short, identical intervals. The eye notices a row of glowing objects instead of the walkway and planting. This is especially distracting on narrow residential paths.
Too Much Uniform Brightness
A path does not need the same brightness from beginning to end. A straight, level section is predictable and can tolerate more space between lighted areas. A curve, step, or gate needs clearer illumination. When everything is equally bright, the important transition points no longer stand out.
Visible Glare at Walking Height
Low landscape fixtures sit near the field of view of children, seated guests, and people walking uphill. If the LED source is directly visible, one bright point can make the rest of the path appear darker. Shielded caps, louvers, diffusers, and careful orientation are often more valuable than adding more output.

Count the Light Pools, Not Just the Fixtures
The useful measurement is how the illuminated areas overlap on the path. Two fixtures can be far apart and still provide comfortable guidance when their distribution is broad. Closely spaced high-output fixtures may create bright stripes and unnecessary repetition.
A Better Placement Framework
Before choosing quantities, walk the path during daylight and mark the points where a guest might slow down, change direction, or need more visual information. The article Where to Place Landscape Lighting: A Practical Guide offers a broader way to think about landscape placement across the property.
Start and Finish
Light the beginning of the path so visitors can identify the route from the driveway, patio, or gate. At the far end, the destination should also be visible. A porch light, wall light, or softly illuminated tree can act as the endpoint, which may reduce the number of path fixtures required.
Curves and Intersections
Place a light on or just before a curve so the next part of the route becomes readable. At a fork, illuminate the intended direction or both choices clearly. Avoid putting the brightest fixture directly in the center of an intersection where people may walk into it or where maintenance equipment can strike it.
Steps and Level Changes
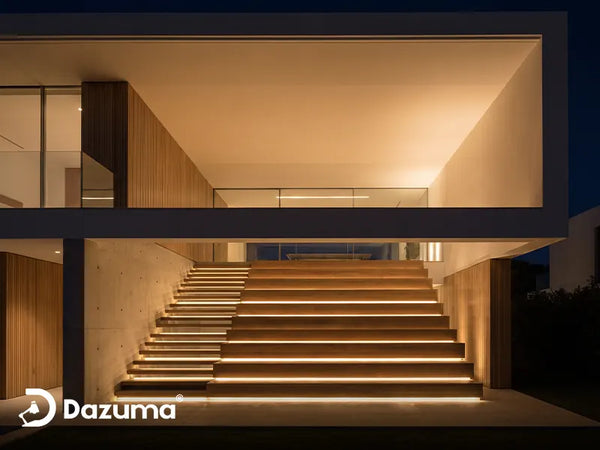
Changes in elevation deserve their own lighting strategy. A path light can help reveal the approach, but the tread and edge of the step may need dedicated step lighting. Do not assume a decorative garden fixture will provide enough contrast for every stair condition.
Planting and Hardscape Features
Use planting beds to soften the view of the fixture, but do not bury the light behind foliage. Leave room for mature plant growth, irrigation spray, trimming, mulch replacement, and cleaning. A fixture that works in a new garden may disappear after one growing season if future height and spread are ignored.
Garden Path Light Spacing Guide
There is no universal spacing number because mounting height, lumen output, diffuser design, path width, background brightness, and nearby surfaces all change the result. Treat the ranges below as testing points rather than fixed installation rules.
| Path Condition | Placement Approach | Suggested Testing Range | What to Check at Night |
|---|---|---|---|
| Straight, level residential path | Stagger fixtures from side to side | Begin testing around 8–12 ft. apart | Can you read both edges without seeing a continuous bright strip? |
| Curved garden path | Place fixtures near the inside or approach to curves | Adjust by visibility rather than equal spacing | Is the next direction obvious before reaching the bend? |
| Narrow side path | Use one side or alternate sides with compact fixtures | Begin around 8–14 ft. depending on output | Do fixtures reduce the usable walking width? |
| Wide courtyard route | Use broader distribution or selected bollards | Begin around 10–16 ft. with on-site testing | Are the center and edges both readable without excessive glare? |
| Steps, gate, or intersection | Concentrate light at the decision point | Do not rely on a standard interval | Are the change in level and intended route clearly visible? |
Install two or three temporary test fixtures before committing to the full layout. View them from both directions and from nearby windows. The correct spacing often becomes obvious only when you see the actual beam on your paving, gravel, lawn, and planting.
When a Taller Mushroom Path Light Works Best
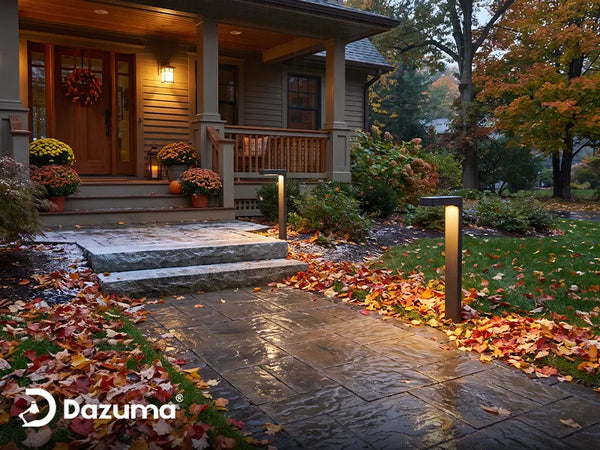
A taller fixture can cast light over a broader section of the path and rise above low groundcover. Mushroom-shaped caps are useful because the source is visually shielded from above, directing attention toward the ground rather than the lamp itself. This makes them a good fit for curved garden paths, lawn edges, hotel-style landscapes, and paths bordered by low planting.
Because the fixture below is 24 inches high and uses a 7W warm-white LED, it can create regular guidance without the intensity of a very high-output bollard. Its black finish also recedes naturally against planting after dark.

Best for Curved Paths and Low Planting
Modern Mushroom LED Path Light Waterproof Outdoor Landscape Post Lamp
Price Shown: $210.99
Best for a garden path that needs a taller, clearly defined fixture with warm downward light and a simple black profile.
- The aluminum body and IP65 rating are specified for outdoor use.
- The mushroom-shaped cap helps keep the visual focus on the illuminated ground.
- Pedestal mounting and AC100–265V input call for planned outdoor wiring and suitable installation.
Use this type of fixture rhythmically, not automatically. On a long straight path, alternate sides and leave enough distance for the light pools to breathe. On a curved path, concentrate fixtures where they reveal the next section. Explore Modern Path Lights when you want a cleaner silhouette that coordinates with contemporary architecture.
Let the Fixture Disappear Into the Planting
A dark finish and shielded source keep attention on the path. Place the post near low foliage, but leave enough clearance for airflow, cleaning, and future plant growth.

When a Low Bollard Works Better
A short bollard can feel more architectural than a traditional path post. It is useful beside wide pavers, courtyard routes, villa entrances, and minimalist gardens where a compact cylinder relates to clean building lines. The tradeoff is that a bright source closer to the ground can produce concentrated glare or overbright patches if fixtures are placed too close together.
The Nordic-style model below is only about 8.27 inches high but is listed at 1600–1800 lumens from an included 18W E27 LED bulb. That output is substantially stronger than many decorative path lights. It should be treated as a broad ambient bollard, not repeated every few feet along a small residential walkway.

Best for Wide Modern Walkways
Modern LED Path Light Minimalist Nordic Garden Light
Price Shown: $274.99
Best for a wider garden route, courtyard, or modern landscape that needs a compact fixture with broad ambient output.
- The die-cast aluminum body uses an outdoor powder-coated gray finish.
- A louvered PC shade spreads ambient light around the compact cylindrical fixture.
- The 110V hardwired design should be planned with appropriate outdoor wiring and professional installation where required.
Because this model is categorized as a bollard and produces high listed output, begin with fewer fixtures and test the result before expanding the layout. Compare the wider Bollard Lights collection when you need stronger architectural definition around a wide route, driveway edge, courtyard, or larger landscape.
Color Temperature and Glare Control
Keep the Main Path Near 3000K
Warm white around 3000K is comfortable for most residential gardens. It supports warm stone, wood, brick, greenery, and evening seating without making the landscape feel clinical. The guide 2700K vs 3000K vs 4000K Outdoor Lighting can help when the path must coordinate with porch, wall, or landscape accent lighting.
Do Not Mix Too Many Beam Styles
A garden path can combine a few taller path lights with step lights at changes in elevation, but repeating several unrelated fixture shapes makes the route look patched together. Keep the main family consistent, then use different fixture types only when they solve a different problem.
Check the Path From Both Directions
A shield may block glare from one approach but expose the source from the other. Walk the route both ways and view it from seated eye level. Also check from bedroom and living-room windows. Outdoor light that feels modest while standing beside it can appear surprisingly bright from inside a dark room.
Keep Light Inside the Landscape
Orient and shield fixtures so the useful light lands on the path and planting rather than neighboring windows or the sky. More controlled light generally improves visibility because the eye is not competing with bright exposed sources.

A Simple Installation Plan
- Walk the route after dark: identify entrances, curves, steps, gates, intersections, and destinations.
- Choose one primary fixture family: use taller path lights for soft guidance or compact bollards for stronger architectural presence.
- Mark only the critical points first: do not begin by drawing a fixture every eight feet.
- Temporarily test two or three fixtures: evaluate the real pools of light on the path from both directions.
- Adjust the rhythm: stagger the lights and widen the spacing along predictable straight sections.
- Review glare and indoor views: check the route from seating, windows, and lower eye levels.
- Plan safe installation: both featured fixtures are hardwired, so confirm outdoor-rated connections, mounting, switching, and local electrical requirements with a qualified professional.
The 24-inch mushroom path light is the more natural choice for a curved walkway, lawn edge, or path bordered by low planting. The short Nordic bollard is better suited to a wider modern route or courtyard where its stronger listed output can be used selectively. Neither fixture should be installed in a dense repeated line simply because the path is long.
The goal is not to remove every shadow. A successful garden path gives people enough information to move comfortably while allowing planting, texture, and darkness to remain part of the scene. When fixtures respond to decisions and level changes instead of an arbitrary grid, the path looks more deliberate—and usually needs fewer lights.