Who This Is For: This guide is for homeowners planning a front walkway, garden path, driveway edge, or courtyard and trying to decide how many bollard lights they actually need before buying fixtures or calling an electrician.

Why Bollard Spacing Feels Harder Than It Should
Most homeowners start with a simple question: “How far apart should outdoor bollard lights be?” Then they discover that every answer seems different. One guide says 6 feet. Another says 10 feet. A product photo may show fixtures almost touching, while a real front walkway may have only four lights across the entire yard.
The confusion comes from treating spacing as a decorating decision when it is really a light-distribution decision. The correct distance depends on how wide the light spreads across the ground, how tall the fixture is, how dark the property is, and whether the goal is continuous visibility or a softer decorative rhythm.
As a practical starting point, I usually tell homeowners to think in ranges, not one magic number. Then test the layout from the street, the front door, and the path itself before anything is permanently wired.
Quick Answer: How Far Apart Should Outdoor Bollard Lights Be?
For a typical residential front walkway, start with bollard lights approximately 8 to 12 feet apart, measured from the center of one fixture to the center of the next.
Move closer to 6 to 8 feet when the bollards are short, low-output, shielded, or installed along tight curves and steps. Move toward 12 to 15 feet when the fixture has a broad, bright distribution and the walkway is open, straight, and already receives light from the porch or garage.
This is a starting layout, not a guarantee. The final spacing should be based on the actual pool of light on the walking surface. The edges of neighboring pools can meet gently, but they do not need to overlap heavily. Too much overlap creates glare, visual clutter, and the “airport runway” look many homeowners are trying to avoid.
A useful rule: Light the decisions a person makes while walking—where the path begins, turns, rises, narrows, or reaches the door—before filling the spaces between those points.
Why One Spacing Number Does Not Fit Every Walkway

Beam Spread Matters More Than Fixture Width
Two bollards can look almost identical during the day but behave very differently after dark. A shielded fixture may send light downward in a tight circle, while a diffused or multi-directional fixture may spread light several feet in every direction.
That is why spacing should follow the illuminated ground area, not the diameter of the metal post. If you cannot find a photometric diagram, temporarily place one fixture—or a flashlight positioned at the same height—where the bollard will go and observe the usable light on the path.
Fixture Height Changes the Visual Rhythm
Short bollards keep the light source low and discreet, which is useful beside low planting and compact paths. They often need closer spacing because shrubs, edging, and snow can block the beam. Taller bollards are easier to see from a distance and can throw light over planting, but placing too many tall fixtures close together can make a small front yard feel crowded.
Before choosing height, compare the fixture with nearby elements: retaining walls, hedges, porch columns, parked vehicles, and the average eye level from the street. Homeowners who are still deciding what counts as a bollard—and how it differs from a post light—may find this guide to what bollard lights are useful before finalizing the layout.
Ambient Light Can Reduce the Number You Need
A path beside a bright garage, porch sconce, or streetlight does not need the same bollard density as a long walkway through a dark side yard. Count the light that already reaches the walking surface. Otherwise, you may pay for extra trenching and wiring only to discover that the entrance looks overlit.
Outdoor Bollard Light Spacing by Walkway Situation
| Walkway Situation | Starting Spacing | How to Adjust |
|---|---|---|
| Straight residential front walk | 8–12 ft | Widen spacing if porch and garage lighting already reach the path. |
| Narrow or compact path | 6–10 ft | Stagger fixtures on one side to avoid a crowded paired look. |
| Curved walkway | 6–9 ft near curves | Place a light before or at the bend so the direction stays obvious. |
| Wide formal entrance walk | 8–12 ft | Pairs can work, but verify glare and visual scale from the street. |
| Dark side-yard path | 6–8 ft | Prioritize continuous visibility and eliminate hidden steps or obstacles. |
| Broad-beam commercial-style bollard | 10–15 ft or photometric plan | Use manufacturer light-distribution data when minimum light levels matter. |
These distances are meant for early planning. The actual fixture optics can move the final number in either direction. When you browse bollard lights, look beyond the daytime shape and check whether the light is diffused, shielded, louvered, or directed in multiple beams.
How Far Should a Bollard Sit From the Edge of the Walkway?
Spacing along the path is only half of the layout. The setback from the walking surface affects glare, maintenance, and how much light actually lands where people step. For many residential installations, placing the fixture roughly 12 to 24 inches from the path edge is a reasonable mock-up position. The right setback depends on the bollard head, beam direction, planting, and whether the base needs a concrete footing.
Do not place the post so close that shoes, strollers, snow shovels, lawn equipment, or delivery carts can strike it. On the other hand, moving a narrow-beam fixture too far into a planting bed may leave the center of the walkway dark. Four-directional bollards also need to be rotated so a useful portion of the beam reaches the path instead of sending most of the light into shrubs or toward a window.
On sloped walks, judge spacing along the walking route rather than as a straight horizontal measurement on a site plan. A fixture at the bottom of a slope may not reveal the upper landing. In that situation, add or reposition a light near the grade change instead of simply maintaining equal distances.
A Simple Layout Method Before You Dig or Run Wire
Step 1: Mark the Non-Negotiable Locations
Start at the front door and walk toward the street at night. Mark the beginning and end of the path, every step, every tight turn, gates, driveway crossings, and places where the surface changes from concrete to gravel or pavers. These are the locations where people slow down or make a decision.
Step 2: Fill the Long Gaps
Measure the distance between the fixed points. Divide the remaining length into equal sections that fall near your starting range. For example, a 36-foot straight section may work with four fixtures placed about 9 to 10 feet apart, depending on whether lights are needed at both endpoints.
Do not buy fixtures based only on a quick “path length divided by 10” calculation. End conditions matter. A porch light may replace the final bollard near the door, while a dark sidewalk connection may require an extra fixture.

Step 3: Test the Rhythm at Night
Use garden stakes, cardboard tubes, or small boxes to represent the fixture bodies. Then use temporary battery lights or flashlights at approximately the same mounting height. Walk the route in both directions and view it from inside the house.
This low-tech test catches problems a drawing misses: one light hidden by a shrub, glare through a bedroom window, a dark patch at a step, or fixtures that appear too closely packed from the curb.
Step 4: Confirm Wiring and Mounting
Hardwired bollards need a stable mounting surface, outdoor-rated connections, and a route that avoids irrigation lines, roots, and future edging work. The two products discussed below are hardwired fixtures, so the final circuit and installation should be reviewed by a qualified electrician and comply with local requirements.
For a broader yard plan that coordinates bollards with wall lights, uplights, and step lights, use a complete landscape lighting layout process rather than treating the walkway as an isolated strip.
For a Long, Modern Walkway: A Diffused Vertical Bollard
A fixture with a tall diffused lighting surface can create a smoother visual line than a small point source. It is especially useful when the walkway is part of a modern front elevation and you want the fixtures to remain visible as architectural elements during the day.
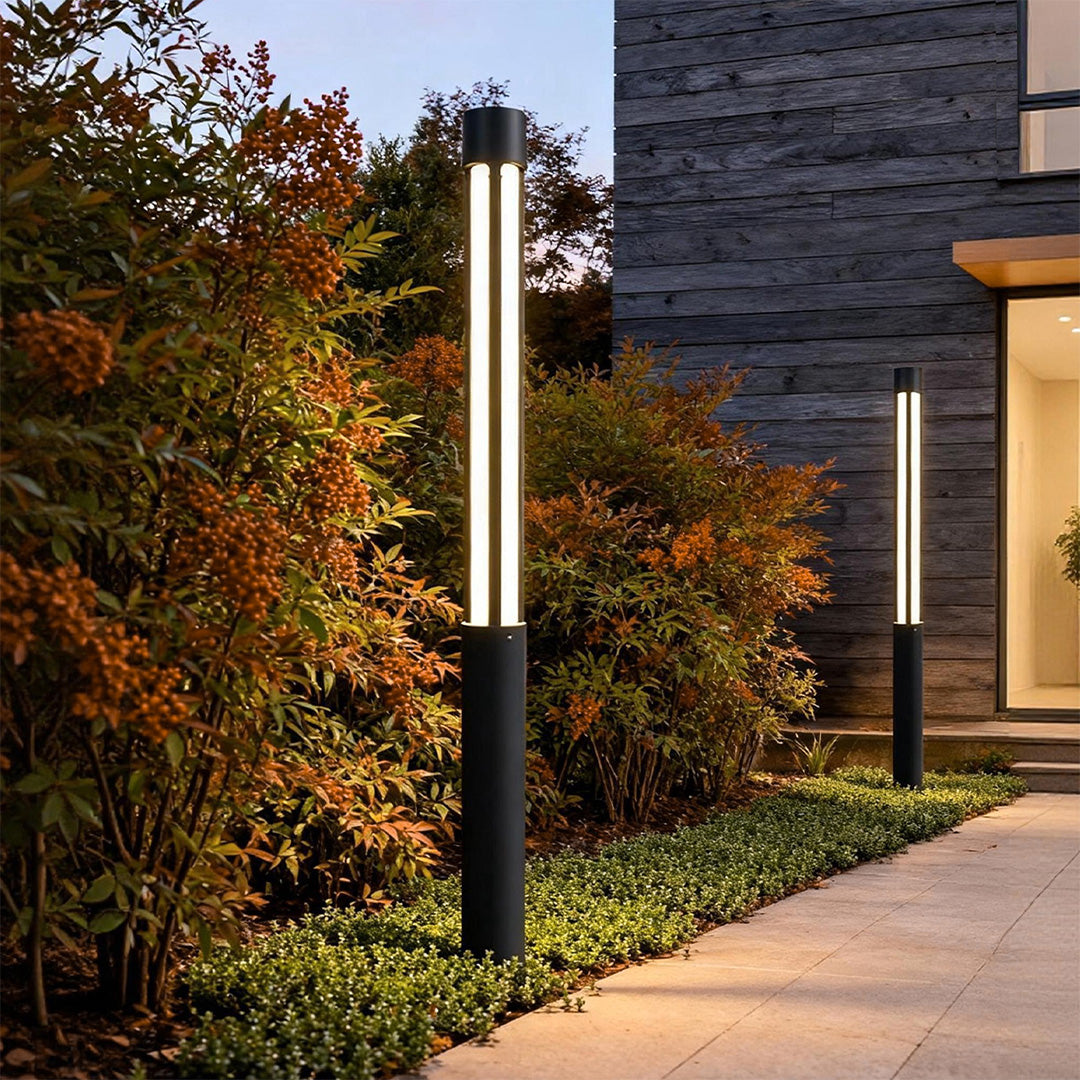
Residential Bollard Lights Modern Cylindrical LED Landscape Light
Price: $389.99
This cylindrical design uses a white PC diffuser to soften the integrated 3000K LED light. Its multiple height options make it easier to coordinate the fixture scale with low planting, open lawns, long driveways, or larger residential landscapes.
- Die-cast aluminum body with a black finish.
- Six height choices for different landscape scales.
- Diffused light can create a softer, more continuous walkway rhythm.
How to Space Bollards Around Curves, Steps, and Entrances
Curves Need Guidance, Not Perfect Symmetry
On a curved walkway, a person needs to see where the path continues. Place one bollard near the outside of the bend or slightly before the curve begins. Then tighten the spacing through the turn if the next section disappears from view. A mathematically even layout can still leave the bend visually dark.
Steps Need Light at the Change in Level
Do not place two bollards halfway between a group of steps and assume the spill light will be enough. Put the priority light where it reveals the tread edge and landing. Depending on the stair design, dedicated step lights may work better than adding more bollards.
The Front Door Usually Needs Less Bollard Light
Homeowners often crowd the final few feet because the entrance feels important. But the door already tends to have sconces, a porch ceiling light, or both. Stop the bollard line early enough that the path lighting blends into the entry lighting rather than competing with it.

Place Light Where the Walking Decision Happens
The most useful fixture is not always the one centered in the longest empty stretch. A bollard near a turn, a gate latch, or the bottom step often provides more practical value than an extra fixture in a straight section.
This is also where mixing fixture types helps. Browse path lights for lower planting beds and reserve taller bollards for areas where stronger visual guidance is needed.
For Focused Pools of Light: A Four-Beam Bollard
A directional multi-beam bollard creates a different effect from a glowing vertical diffuser. Instead of reading as one continuous luminous column, it sends distinct beams outward. That can be useful around garden edges, villas, and wider landscape zones where you want the light pattern itself to contribute to the design.
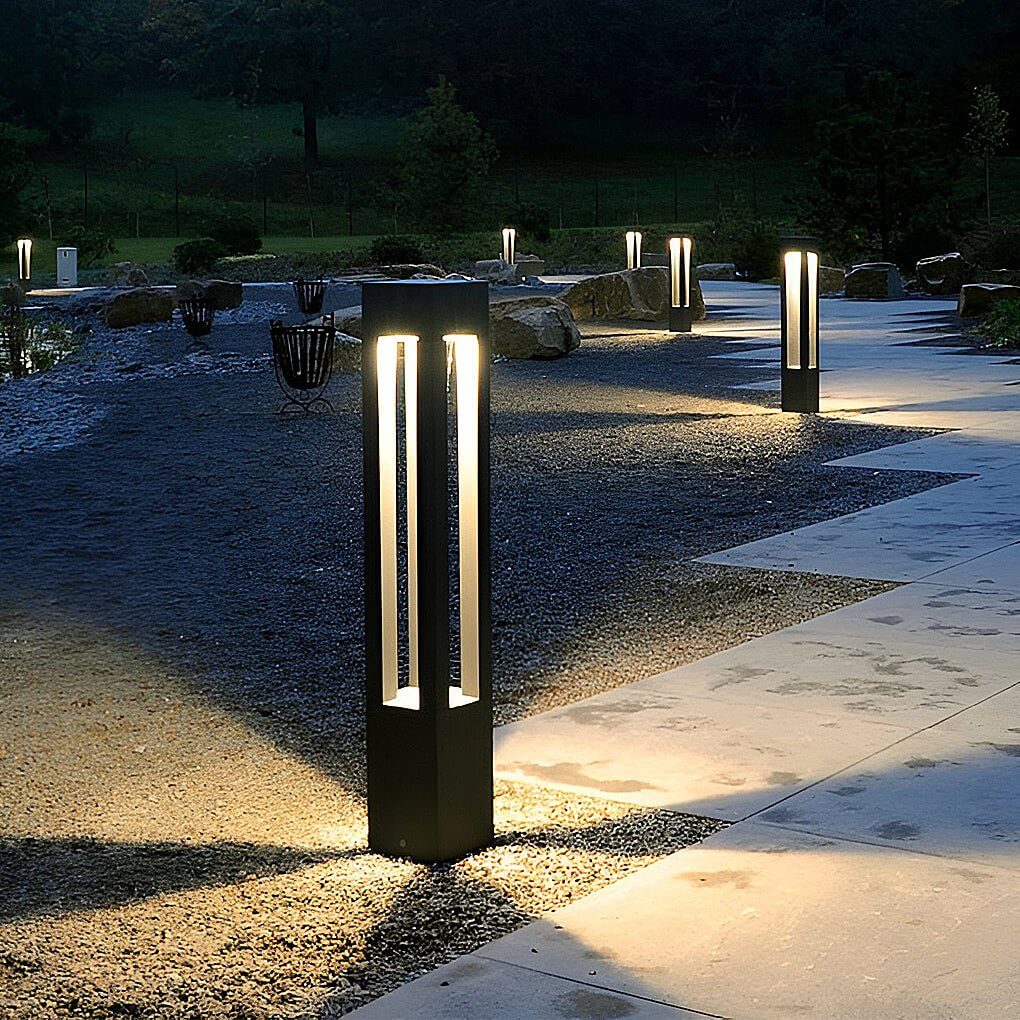
LED Bollard Garden Light Black Aluminum Garden Landscape Light
Price: $229.99
This black bollard uses a four-directional LED lighting pattern with warm 3000K light. Four available heights allow a homeowner or designer to keep fixtures low beside planting or choose a taller proportion for a more visible landscape statement.
- Die-cast aluminum body with a glass shade.
- Four height options from 11.8 to 31.5 inches.
- Directional beams make nighttime spacing and orientation especially important.
Common Bollard Spacing Mistakes That Cost More to Fix Later
Installing Every Fixture at the Same Distance
Uniform spacing looks tidy on a plan, but real yards are not uniform. Curves, shrubs, steps, and existing lights change the required placement. Keep a consistent visual rhythm where possible, but allow the spacing to tighten or widen when the site demands it.
Putting Bollards on Both Sides of a Narrow Path
Paired lights can suit a wide, formal entry, but they often overwhelm a standard residential walkway. A staggered single-side layout usually feels more natural and uses fewer fixtures. It also leaves more room for planting and lawn maintenance.
Ignoring Mature Plant Size
A small shrub can become a light-blocking wall in two seasons. Keep fixtures outside the mature spread of plants, not the size they are on installation day. Also consider whether mulch, snow, or fallen leaves may cover a low light opening.
Choosing Spacing Before Choosing the Fixture
The optics determine the spacing. Select the fixture family first, then test or review its light distribution. Comparing modern path lights with taller bollards can also reveal that a mixed layout is better than repeating one fixture everywhere.
Lighting the Landscape Instead of the Walking Surface
A beautiful glow in the plants does not automatically make a walkway safe. Stand on the path and look down. Tread edges, surface changes, puddles, and obstacles should be visible without forcing your eyes to adjust between very bright and very dark zones.
Final Advice: Start at 8 to 12 Feet, Then Design for the Actual Path
For most residential walkways, 8 to 12 feet is a sensible first spacing range. Tighten the layout for low-output fixtures, narrow beams, curves, steps, and very dark areas. Widen it when a broad-beam bollard overlaps with porch, garage, or street lighting.
The best result rarely comes from placing the maximum number of fixtures. It comes from making the route obvious, the entrance welcoming, and the landscape comfortable to view from both inside and outside the home. Mark the critical points first, test the proposed locations after dark, and let the actual beam pattern—not a generic spacing rule—determine the final distance.
When the walkway is only one part of a larger project, coordinate it with the rest of your outdoor lighting so every fixture has a clear purpose and the property does not become unnecessarily bright.