Who This Is For: This guide is for homeowners whose front walk, driveway-to-door route, garden path, porch steps, or deck stairs becomes difficult to read after the earlier sunsets of fall and winter.
Introduction
A path that feels obvious at 7 p.m. in July can become an uncertain sequence of shadows at the same hour in November. The issue is not simply that there is less daylight. Fallen leaves hide edges, wet paving reflects a fixture differently, and a porch light that once reached the first step may leave the driveway approach dark. Guests do not know the small changes in level that you step over automatically.
Good walkway and step lighting gives people advance information: where the route goes, where the next turn is, and whether the surface rises or falls. It should illuminate the walking surface without forcing anyone to stare into a bulb. You can often achieve that with fewer, better-positioned lights than a continuous row of bright stakes.

The Quick Answer: Light the Surface and the Next Decision
Start at the route people actually use after dark. Give priority to the transition from car or sidewalk to path, every bend or fork, the top and bottom of each stair flight, individual treads that would otherwise merge into darkness, and the doorway. Aim light down and across the walking surface with the source shielded from normal approach angles. Add fill only where a dark gap prevents a person from seeing the next destination.
There is no universal number of feet between path lights. A fixture's mounting height, beam spread, output, nearby porch light, paving color, and surrounding plants all change the result. Test temporary positions at night and judge whether feet can see the path, not whether the fixtures make a symmetrical dotted line. A run of safe, level paving may need fewer lights than one short stair.
Lighting is one layer of safety, not a repair for a broken route. Fix loose treads, uneven pavers, poor drainage, and slippery surfaces. Clear leaves and snow. If a stair or path needs structural changes or electrical work, involve a qualified professional and follow applicable local requirements.
Map the Route After Dark Before Buying Fixtures
Walk the property at the time family members and guests usually arrive. Start where a car parks or where a person leaves the sidewalk. Continue to the door, side gate, trash area, and any patio used in the evening. Bring someone unfamiliar with the property if possible; they are more likely to notice an ambiguous step or a path that appears to lead into a planting bed.
Mark four kinds of locations: transitions between surfaces, decisions such as bends and forks, hazards such as steps or grade changes, and destinations such as gates and doors. A small light at each meaningful location often communicates more than equidistant lights on a straight stretch.

Look From Both Directions
Approach from the street, then walk back toward the car. A light that is comfortable in one direction can shine directly into eyes from the other. Sit in the car at a normal arrival position as well; a raised source near the driveway can produce glare just when a driver is looking for pedestrians.
The broader guide to where to place landscape lighting helps prioritize the entrance, circulation route, and a few landscape features before selecting fixtures.
Notice What Existing Light Already Covers
Turn on the porch and garage lights first. A wall-mounted fixture may already illuminate the landing and a few feet of path. Do not double-light those areas simply to maintain identical fixture spacing. Instead, find the first place the existing pool fades and the route becomes uncertain. That is a better starting point for the next fixture.
Place Walkway Lights at Changes, Then Fill the Gaps
Curves and Forks
Put light on the inside or outside of a curve according to where its beam reaches the pavement without exposing the lamp. At a fork, make both destinations legible before a guest commits to a direction. A light only at the far end can make the junction itself disappear.
Straight Runs
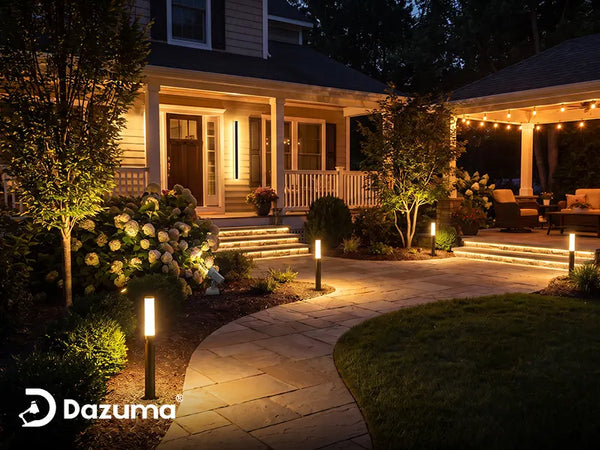
Staggering fixtures can create a natural rhythm and avoid a runway effect. Formal architecture may call for pairs, but symmetry should not outrank visibility. When using path lights, set them back where feet, carts, mowers, and snow shovels are less likely to strike them. Confirm that the beam still reaches the walking surface rather than lighting only the bordering mulch.
Driveway and Sidewalk Transitions
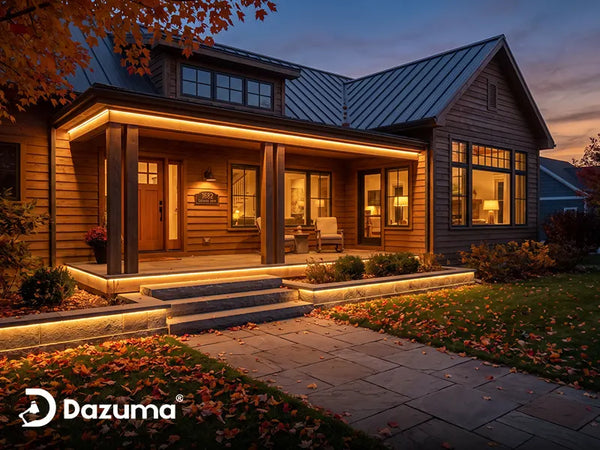
These locations deserve an identifiable handoff. The first step off the driveway or curb can be difficult to see because the two surfaces may have similar color. Light the route from an angle that reveals its edge and texture. Keep fixtures outside tire paths and avoid using decorative garden lights where vehicles might cross them.
Narrow or Elevated Paths
Where a path borders a retaining wall, drop, planting bed, or water feature, the boundary may need more consistent visibility than an open lawn path. Low, shielded bollard lights can serve wider paths or defined edges when their height and beam suit the setting. Check for eye-level glare from a wheelchair, child, or seated patio position as well as from a standing adult.
Judge Pools of Light, Not Stake-to-Stake Spacing
Set a temporary light in place and walk away until the next section of paving becomes hard to read. Place the following light where it restores continuity. This accounts for the actual beam, foliage, and paving color instead of relying on a generic spacing formula.
Keep some darkness in planting beds. The goal is a readable route, not a uniformly bright yard. Carefully targeted, low-level illumination also limits spill into neighbors' windows and keeps the garden's nighttime depth.

Make Every Change in Level Clear
Stairs need more specific treatment than a level walkway. The viewer should see the landing, tread surface, front edge, and where the next step begins. A bright dot at the side is not enough if the center of the tread remains invisible.
Light From a Side Wall or Riser
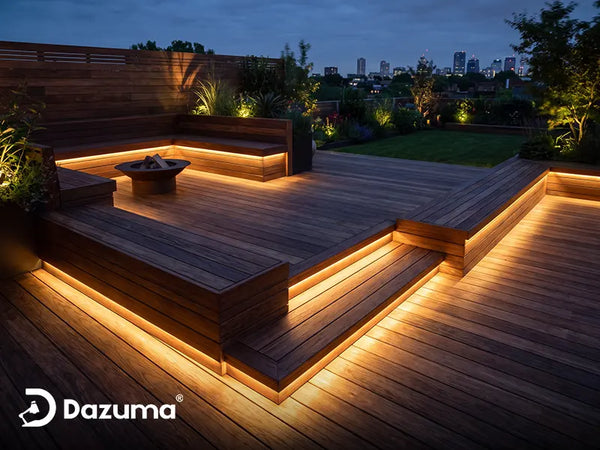
Where the construction allows it, a shielded light in a side wall or riser can cast light across the tread while hiding the source from someone approaching. A recessed design can reduce protrusions, but the housing must be suitable for the exact outdoor location and installation surface. Consult a professional for permanent wiring, wet locations, masonry work, or changes to a stair assembly.
Use a Nearby Wall Fixture for Landings
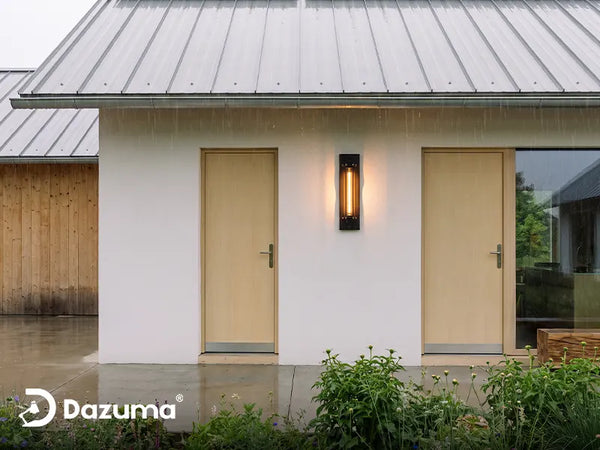
A carefully aimed fixture on the house or porch can reveal the top landing, door, handrail, and faces without another lamp on each stair. Compare outdoor wall lighting by shield, beam direction, and the view from below the steps. An exposed bulb at the top can make the treads harder to distinguish because eyes adapt to the brighter source.
Check the View From the Top and Bottom
Descending often makes the front edges and landing especially important. Stand at the top and verify that each tread separates visually from the next, then repeat from below. If the surface looks flat or striped, change the fixture angle or add a restrained side layer. Avoid a brilliant under-tread strip that makes the glowing line more visible than the place a foot must land.

Keep Handrails and Edges Legible
Light should help someone locate the handrail before starting down. Do not let a decorative planter, seasonal display, or snow pile block the rail or a step light. Contrasting tread or nosing materials may help people identify edges in daylight and at night; lighting works with those features rather than replacing them.
For a longer stair with several turns, test each flight and landing separately. One top-of-stairs porch lamp may not reach a lower flight around a corner.
Compare Lighting Methods for Walkways and Steps
| Method | Best Use | Main Advantage | Check Before Buying |
|---|---|---|---|
| Wired low-voltage path light | Main entrance route | Consistent operation when properly planned | Transformer, cable, run length, and weather rating |
| Solar path light | Sunny secondary path or flexible accent | No trenching and easy repositioning | Winter sun, shade, battery, and actual runtime |
| Shielded step or riser light | Treads and landings | Light close to the change in level | Mounting surface, exposure, wiring, and glare |
| Outdoor wall fixture | Porch, landing, door, and first steps | Can illuminate several useful features at once | Beam aim from both stair directions |
| Low bollard | Wide walk or clear boundary | Defines a route with fewer taller points | Projection, shielding, and impact exposure |
For a front walk used every night, reliability matters as much as installation convenience. The comparison of low-voltage and solar path lights explains how shade, wiring, and winter charging affect that choice.
Control Glare, Contrast, and Light Color
Hide the Bright Source
A lamp that shines into a pedestrian's eyes can reduce their ability to see the darker tread beyond it. Favor shielded, downward-directed fixtures, and check from a child's height as well as adult standing height. A good result feels easy to navigate without calling attention to the bulb itself.
Choose Enough Light, Then Stop
Do not use one lumen figure as a rule for every property. Dark pavers absorb more light than pale concrete, snow reflects more light than mulch, and a wide tread needs a different beam than a narrow path. Start with the least output that makes the route clearly readable, then adjust placement or distribution before increasing brightness.
Keep Color Consistent Along the Route
Warm white often feels welcoming at a residential entry, while a slightly more neutral appearance can make some surfaces look crisp. What matters most is that neighboring lights do not create abrupt color changes or distracting patches. Use similar color temperatures on adjoining path and step zones, then test the actual scene after dark.
Make the Lights Come On Before the Route Disappears
As days get shorter, a fixed summer on time can leave the path dark during normal arrivals. Review the schedule at least once in early fall and again after the daylight saving change where applicable. A dusk-to-dawn sensor or astronomical timer can follow seasonal sunset, while a fixed off time can keep decorative lighting from operating unnecessarily late.
Do not rely on motion-only lighting for every step if its sensor leaves a dark first step or has a noticeable delay. If motion control is used, test its detection from both travel directions and with a person approaching at an ordinary pace. The route should become visible before the hazard is reached, not after.
For a shaded entry, solar path lights need special scrutiny. Short winter days, tree shade, snow on panels, and battery condition can shorten runtime. Use a dependable primary layer for critical steps and treat a solar accent as supplemental unless you have verified performance under your actual winter conditions.
Prepare for Wet Leaves, Rain, Snow, and Ice
Outdoor fixtures must be suitable for their exact exposure, and the same is true of connectors, power supplies, and controls. A sheltered wall and an open path are different environments. Use GFCI protection where required; keep electrical connections protected from standing water; and leave permanent wiring to qualified installers where local rules or the job call for one.
Recheck the Scene After a Weather Change
Wet leaves can cover a fixture and also conceal a step edge. Snow can reflect light into eyes and hide low markers. After a storm, clear the path and steps first, then inspect the lighting from the normal approach. Never use a light fixture as a handhold, and avoid striking wiring or housings with a shovel.
Keep Fixtures Accessible
Place lights where you can clean lenses, trim foliage, and inspect seals without stepping into traffic or damaging plants. A light buried by seasonal growth cannot guide anyone. Make the after-dark walk a quick part of fall yard maintenance.

Common Mistakes That Make a Path Look Lit but Hard to Use
- Lighting the plants instead of the paving: The path remains dark even though the fixture is conspicuous.
- Creating a dotted runway: Equal stake spacing looks orderly but misses the turn, landing, or lone step.
- Using exposed uplights near the route: Glare can obscure the surface beyond the lamp.
- Stopping at the first stair: The upper landing or lower flight may still disappear in shadow.
- Assuming summer solar runtime applies in winter: Shorter days and shade can change the result.
- Leaving a fixed schedule untouched: The lights switch on after guests have already arrived in darkness.
- Calling lighting a complete safety fix: Loose treads, ice, drainage, and blocked handrails still need attention.
A Practical Nighttime Test Checklist
- Walk from the parking spot or sidewalk to the door with the normal exterior lights on.
- Mark every curb, change in surface, bend, fork, gate, step, and landing.
- Test temporary lights so each next decision is visible before you reach it.
- Look at each stair from above and below; verify the tread surface and edge.
- Check glare from adult, child, vehicle, and indoor window viewpoints.
- Inspect fixture exposure, power connections, cord routes, and snow-removal clearance.
- Observe an automatic on/off cycle rather than only a manual test.
- Repeat the walk after rain or snowfall and adjust brightness or aim if necessary.
Final Advice
The safest-looking walkway is not necessarily the brightest. The useful one lets a first-time visitor understand where to walk and where the ground changes before taking the next step. Begin with transitions and stairs, use shielded light that reaches the surface, then add only enough fill to connect the route.
As fall turns to winter, revisit the plan. Earlier sunset changes when the lights should operate, while leaves, rain, snow, and bare branches change how the light reaches the ground. A short nighttime test and basic path maintenance can preserve the warm welcome you intended without turning the yard into a floodlit corridor.