Who This Is For: This guide is for homeowners, remodelers, and DIY planners laying out recessed can lights before ceiling holes are cut—especially anyone trying to avoid dark wall edges, harsh scallops, or rows that look awkward once the furniture is in place.

Quick Answer
For general residential lighting, place the first row of recessed can lights about 24 to 30 inches from the wall in rooms with 8- to 10-foot ceilings. A better calculation is to place that first row at roughly half the planned distance between lights. If your lights are 4 feet apart, start about 2 feet from the wall; if they are 5 feet apart, start about 30 inches from the wall.
That is a layout starting point, not a building-code requirement or a promise of perfect light. A wide-beam downlight used for general illumination behaves differently from a narrow adjustable light aimed at artwork. Wall color, ceiling height, fixture output, trim depth, furniture, upper cabinets, and the room’s purpose can all justify moving the row closer or farther away.
If you want an even wash from ceiling to floor, use a fixture or trim designed for wall washing and follow its photometric or spacing guidance. If you want to highlight art, calculate from the artwork’s center and the fixture’s aiming range. The familiar 24-inch rule is useful only after you know what the light is supposed to accomplish.
Where the Measurement Starts
Measure perpendicular from the finished wall surface to the center of the recessed-light aperture. Do not measure to the outer edge of the trim. On a floor plan, the center point is what the electrician needs, and it remains consistent whether the visible trim is 2 inches or 6 inches wide.
Also distinguish wall offset from fixture spacing. Wall offset is the distance from the wall to the first row. Fixture spacing is the center-to-center distance between lights in the same row. Confusing those two measurements can push the entire layout too far into the room and leave the perimeter gloomy.

Mark Centers, Not Trim Edges
Before any cutting begins, mark each intended center with painter’s tape or a removable dot. Stand at the room’s entrances and compare those marks with walls, windows, cabinetry, and focal points. A mathematically even grid can still look misaligned if it ignores the architecture.
The Half-Spacing Method
A common first-pass layout sets the center-to-center spacing between general downlights at about half the ceiling height. An 8-foot ceiling therefore starts near 4 feet between lights; a 10-foot ceiling starts near 5 feet. The first row then sits about half that fixture spacing from the wall.
This creates a balanced perimeter because the wall acts like the edge of the lighting pattern. Imagine each recessed light covering a circle on the floor. A light at the room’s edge only needs to carry its portion of that pattern toward one side, while an interior light shares coverage with fixtures on both sides. Keeping the wall offset near half the row spacing helps avoid a dim border without crowding the wall.
Use this method to sketch the layout, then check the actual beam information for the fixture. The selection of can lights includes different aperture styles and light distributions, so two fixtures placed at the same coordinates may produce noticeably different results.
How the Lighting Purpose Changes the Distance
The phrase “recessed lighting” covers several jobs. A fixed downlight points primarily toward the floor. An adjustable trim can aim toward a vertical surface. A wall-wash trim uses an asymmetric distribution to spread light across a wall. The correct setback follows the job and the optical design.
General Ambient Lighting
For a comfortable base layer, 24 to 30 inches from the wall is a practical starting range under common residential ceiling heights. The goal is not to create a bright stripe along the perimeter. It is to let the outer beam overlap the wall and floor gently while the next row completes the room’s coverage.
In a pale room with reflective walls, the row may be able to sit slightly farther inward. Dark paint, deep shelving, or heavy curtains absorb more light and may make the perimeter feel dimmer. Rather than automatically adding more cans, consider lighting one important vertical surface and using lamps or sconces to build depth.
Wall Washing
Wall washing aims for a broad, relatively even field of light rather than visible cones. Dedicated wall-wash trims are much more reliable than ordinary fixed downlights because their optics direct more output toward the vertical plane. In an 8- to 10-foot room, a mockup range of roughly 24 to 36 inches from the wall is often reasonable, but the fixture manufacturer’s photometric data should decide the final setback and spacing.
A row placed too close can produce bright upper-wall scallops and a dark lower section. Too far away, and the light may flatten into floor illumination before it reaches the wall. Keep fixtures in the row evenly spaced unless a door, window, or architectural feature gives you a clear reason to change the rhythm.
Artwork and Accent Lighting
For art, a typical residential starting point is about 18 to 30 inches from the wall, using an adjustable recessed light or a directional ceiling fixture. The correct point depends on ceiling height, the artwork’s center, and the trim’s aiming limits. Aim steeply enough to reduce reflections and people’s shadows, but not so steeply that the frame casts a heavy shadow down the wall.
One useful way to think about the layout is the target line: draw an imaginary line from the fixture center to the center of the artwork. If a fixed downlight cannot direct its beam along that line, moving the hole alone will not fully solve the problem. An adjustable trim or a purpose-built option from the ceiling spotlights collection may offer better control when displays change.
New Insight: Ceiling Symmetry Is Not Light Symmetry
A perfectly centered aperture can create an uneven wall if the optic sends most of its output straight down. Conversely, an asymmetric wall-wash trim may look ordinary at the ceiling but distribute light evenly across the surface. Judge the ceiling pattern and the nighttime beam pattern as two separate design decisions.

Ceiling Height and Wall Offset Table
The table below applies the half-ceiling-height rule for the spacing between general downlights, then places the first row halfway between that spacing and the wall. Use it to begin a drawing—not to replace the fixture’s beam data or an on-site review.
| Ceiling Height | Starting Fixture Spacing | Starting Wall Offset | What to Verify |
|---|---|---|---|
| 8 feet | About 4 feet | About 24 inches | Seated glare and perimeter brightness |
| 9 feet | About 4.5 feet | About 27 inches | Beam overlap at the work or seating plane |
| 10 feet | About 5 feet | About 30 inches | Output, beam angle, and darker finishes |
| 12 feet | About 6 feet | About 36 inches | Whether a narrower or higher-output optic is needed |
Higher ceilings do not automatically mean you should use many more fixtures. They often call for a different beam or more delivered light at the target. Compare complete ceiling lights and layered sources before assuming a dense recessed grid is the only way to make the room feel bright.
Room-by-Room Placement Guide
Living room: Begin around 24 to 30 inches from the wall for general light, but protect normal seated sightlines. Avoid placing a bright aperture directly over the front edge of a sofa or above a reclining viewer. Use ceiling light as a dimmable base and add lamps at human height. The guide How to Layer Living Room Lighting Without Glare explains why several controlled layers feel calmer than one intense grid.
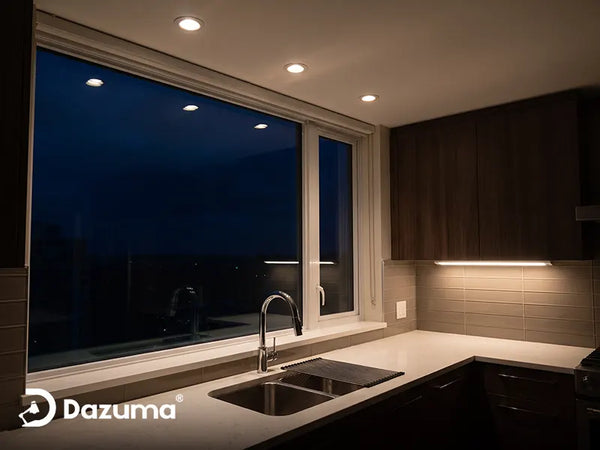
Kitchen: The wall alone is not the primary reference; the countertop edge and cabinet faces matter more. A can centered roughly 18 to 24 inches from a wall may land near the working edge of a standard-depth counter, but upper cabinets can block or redirect the beam. Position task light to reach hands and food-prep surfaces without putting the cook’s body between the light and the counter. Coordinate recessed fixtures with undercabinet and decorative kitchen lighting.
Bedroom: A 24- to 30-inch offset can work around the perimeter, but do not let layout symmetry place bright downlights over pillows. Recessed lights are usually most useful near circulation, closets, dressers, or wall art. Bedside lamps and wall lights provide more comfortable reading light.
Hallway: Center the row on the walking path when the hall is narrow and symmetrical. That may be more useful than measuring from one wall. If the corridor is wide or displays art along one side, an adjustable or wall-wash row can sit closer to the display wall.
Bathroom: Coordinate with the vanity, mirror, shower rating, and local electrical requirements. A ceiling downlight directly over the mirror can create shadows under the eyes and chin. Vertical light near the face is usually more flattering, while appropriately rated recessed lighting supports ambient or shower illumination.

Place Kitchen Light Where the Work Happens
In kitchens, measuring only from the backsplash wall can be misleading. Check a section view showing the ceiling, cabinet depth, counter edge, and the user’s standing position. The beam should reach the task before the person blocks it.
Beam Angle, Trim, and Glare
Beam angle determines how quickly the light spreads as it travels away from the ceiling. A wider beam creates broader overlap and usually tolerates more spacing variation. A narrow beam produces stronger emphasis but makes misalignment more visible. Lumens describe total output; they do not tell you where that output lands.
Trim design changes comfort as well. Deep-regressed sources and baffles can hide the brightest part of the lamp from normal sightlines. Thin, flat canless wafers solve many shallow-ceiling problems, but their luminous surface is close to the ceiling plane and can be more visible across the room. “Flush” describes the hardware profile, not automatically low glare.
Before committing to every opening, temporarily test one fixture or review its photometric diagram. Look from the sofa, bed, hallway entrance, and any position where someone may recline. Then check whether the beam reaches the intended wall or work plane. For living rooms specifically, How to Light a Living Room the Right Way provides a broader framework for matching ceiling light with the room’s scale and activities.
Test From Eye Level, Not Only From Below
A floor plan can show coverage but not discomfort. Switch on a sample light, sit where people actually sit, and look toward the ceiling naturally. If the bright source remains obvious, a deeper trim, different position, lower output, or better dimming may help more than another spacing formula.

Joists, Cabinets, Fans, and Other Obstacles
A clean drawing must survive the actual ceiling. Joists, trusses, ducts, pipes, sprinkler heads, speakers, smoke alarms, curtain pockets, and fan blade paths can force revisions. Canless fixtures reduce housing-depth demands, but their driver boxes and wiring still need safe, accessible locations. Traditional housings require suitable clearance and construction compatibility.
Do not shift a single fixture a few inches without checking the full row. One off-center light is often more noticeable than a row that was intentionally re-centered. If an obstruction breaks the ideal grid, consider aligning the row with a window, cabinet run, or focal wall so the revised pattern still has a visual reason.
Ceiling fans deserve special attention. Recessed lights placed above moving blades can create a pulsing shadow or flicker effect. Keep the beam paths outside the blade sweep and evaluate the fan at operating height. A qualified electrician should confirm the ceiling conditions, fixture listing, insulation contact requirements, wiring, and local code before installation.
Common Layout Mistakes
- Using 24 inches as a universal rule: The correct distance changes with ceiling height, beam, target, and trim.
- Measuring to the trim edge: Plans and spacing should reference the aperture center.
- Starting with a perfect grid: Furniture, counters, art, windows, and circulation should define the useful pattern.
- Putting lights too close to the wall: Ordinary downlights may create bright scallops high on the wall and weak coverage below.
- Putting them too far inward: The wall perimeter can feel dim even when the center of the floor is overlit.
- Ignoring seated glare: A layout that feels fine while standing may be uncomfortable from a sofa or bed.
- Assuming a canless wafer behaves like a deep can: The source position and optical control can be very different.
- Cutting before checking structure: Hidden framing and utilities can disrupt the intended row.
Pre-Installation Checklist
- Define each row as ambient, wall-wash, task, or accent lighting.
- Draw walls, windows, furniture, counters, cabinets, fans, art, and major circulation paths.
- Select the fixture before finalizing holes; record lumens, beam angle, trim type, and aiming range.
- For general lighting, begin with spacing near half the ceiling height and a wall offset near half that spacing.
- Measure every wall offset to the center of the aperture.
- Use manufacturer photometrics for wall-wash and precision accent applications.
- Mark centers on the ceiling and inspect the pattern from doorways and seating positions.
- Verify dimmer, driver, and fixture compatibility.
- Ask an electrician to locate obstructions and confirm installation requirements before cutting.
Final Advice
For most 8- to 10-foot residential ceilings, 24 to 30 inches from the wall is a dependable starting point for the first row of general recessed can lights. The more transferable rule is to place the first row at roughly half the center-to-center fixture spacing. That keeps the perimeter connected to the rest of the lighting pattern.
Move beyond that rule when the goal is wall washing, artwork, kitchen tasks, or glare control. Select the optical type first, measure to the fixture center, and test the effect at eye level. A thoughtful layout uses fewer lights with clearer jobs; it does not simply fill the ceiling with an even grid.