Who This Is For
This guide is for homeowners, DIY renovators, and outdoor enthusiasts who want a professionally designed landscape lighting layout — without the professional price tag. Whether you're starting from scratch on a new build, refreshing an aging setup, or simply tired of a yard that disappears into darkness after sunset, these seven steps will give you the structure, the specs, and the confidence to get it right the first time.
Great landscape lighting doesn't happen by accident. It's the result of deliberate planning — knowing where to place fixtures, how much light each zone actually needs, and which products will hold up through rain, frost, and years of outdoor exposure. A well-executed outdoor lighting plan can boost your home's curb appeal dramatically, extend your outdoor living hours well into the evening, and add a meaningful layer of security to your property.
Too many homeowners skip the planning phase entirely and end up with mismatched fixtures, harsh glare, dark dead zones, and an outdoor space that looks like a parking lot after dark. This guide fixes that. Follow these seven steps and you'll walk away with a landscape lighting layout that looks intentional, feels inviting, and works the way you need it to.

Why Landscape Lighting Planning Matters
According to the American Lighting Association, well-executed outdoor lighting can increase a home's perceived value by up to 20%. Beyond aesthetics, it serves a clear safety function — illuminating driveways, walkways, steps, and entry points to prevent accidents — and acts as one of the simplest, most cost-effective deterrents against property crime. Research published by the U.S. Department of Justice consistently shows that adequate exterior lighting reduces residential break-ins.
But here's what most lighting guides won't tell you: more fixtures does not equal better results. The goal isn't raw brightness — it's intentional contrast. Strategic darkness is just as important as strategic light. A single tree uplighted against a dark background becomes an architectural statement. That same tree surrounded by uniformly bright ambient light disappears entirely into the noise.
Planning first means fewer fixtures, better results, and significantly less expensive rework. Let's get into it.
Step 1: Assess Your Outdoor Space
Do a Nighttime Walkthrough
Before you buy a single fixture, go outside after dark — ideally on a clear night with your existing outdoor lights switched off. Walk your property the way a first-time visitor would. Note exactly where it's dangerously dark, where uncomfortable shadows pool near entry points, and where your home's architecture and landscaping are completely invisible. Bring a flashlight and a notepad.
Identify Your Focal Points
Make a list of everything worth highlighting: a mature oak or magnolia, a stone pathway, the textured façade of your home, a garden bed in bloom, a water feature, or a deck where you regularly entertain. These are your anchor points — every other fixture in the plan supports them. Also note where your existing electrical outlets and junction boxes are located; this will shape your options when deciding between low-voltage wired systems and solar-powered fixtures.

Sketch a Simple Layout Map
You don't need CAD software or professional drafting skills. A rough pencil sketch on graph paper is completely sufficient. Map out your home's footprint, the main garden beds, pathways, driveway, and any standout trees or structures. Mark compass direction (north) for reference, and note where existing electrical infrastructure is located.
This sketch becomes your working document for the entire project. You'll use it to mark lighting zones, fixture positions, and cable runs. It saves hours of second-guessing later — and makes communication much easier if you end up hiring an electrician for the wiring stage.
Step 2: Define Your Lighting Zones
Professional landscape designers think in zones — distinct areas of a property with different lighting goals and different fixture requirements. Rather than treating your whole yard as one problem to solve, break it into manageable sections, each with a specific purpose.
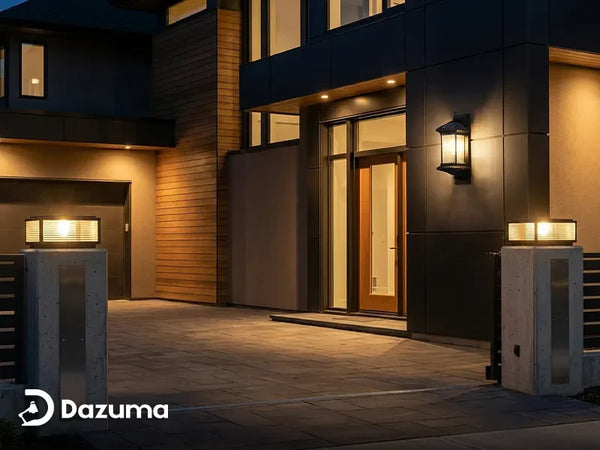
Safety and Security Zones
These are your non-negotiables: front entry, driveway approach, side gates, pathways, and steps. The goal here is consistent, even illumination that guides movement and discourages unwanted visitors. Fixtures in these zones should be weather-rated, reliable, and ideally integrated with motion sensors or dusk-to-dawn automation for hands-free operation.
Accent and Feature Zones
These are the visual anchors of your design — uplighting a specimen tree, washing light across a stone retaining wall, or grazing a textured exterior surface. This is where the real artistry of landscape lighting lives. These zones rely on lower-lumen, precisely aimed fixtures to create depth, shadow, and visual drama.
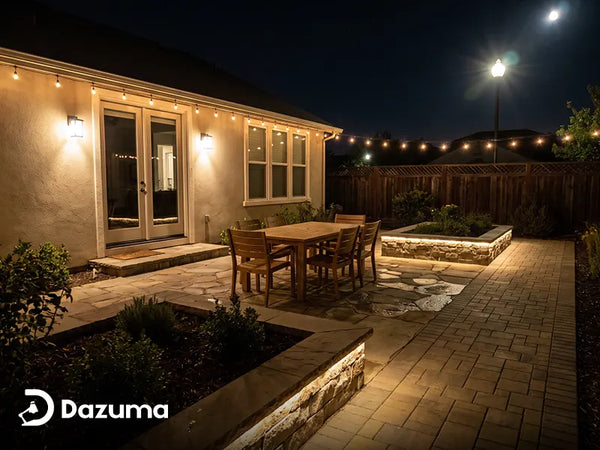
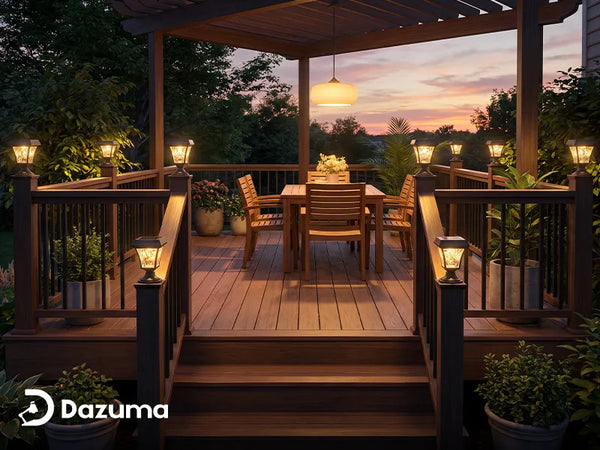
Ambient and Entertainment Zones
Patios, decks, pergolas, and outdoor dining areas fall here. Lighting in this zone needs to be warm, flexible, and comfortable — bright enough to socialize and eat by, but not so clinical that it kills the atmosphere. String lights, pendant fixtures, and low bollard lighting are especially effective in this zone.
Step 3: Choose the Right Fixture Types
Each zone calls for different tools. Here's a breakdown of the core landscape lighting fixture types and where each one belongs:
| Fixture Type | Best Application | Typical Output |
|---|---|---|
| Path Lights | Walkways, garden edges, driveways | 40 – 100 lm |
| Spotlights / Uplights | Trees, shrubs, architectural accents | 120 – 600 lm |
| Flood Lights | Driveways, open lawns, security zones | 700 – 2000 lm |
| Bollard Lights | Pathways, borders, entrance zones | 100 – 400 lm |
| Well Lights (In-Ground) | Tree uplighting, recessed wall wash | 200 – 800 lm |
| String Lights | Patios, pergolas, ambient zones | 15 – 60 lm per bulb |
For walkways and garden borders, path lights are the workhorses of any landscape plan — low-profile, energy-efficient, and designed to guide movement without flooding the space. For accent work on trees, shrubs, or architectural features, precision-aimed outdoor spotlights give you surgical directional control. For broad coverage across a driveway or open area that needs security-grade illumination, flood lights are your highest-output option.
For a refined, low-profile look along an entrance path or garden edge, bollard lights add a clean, architectural touch that works beautifully in both contemporary and traditional settings. The key is resisting the urge to use just one fixture type for everything — the magic of a great landscape layout comes from variety and contrast between zones.

Step 4: Plan Your Fixture Placement
The Staggered Path Lighting Rule
Resist the temptation to line path lights symmetrically on both sides of a walkway. That creates a runway effect — functional, but hardly beautiful. Instead, alternate fixtures on opposite sides every 8 to 10 feet. This staggered placement creates a flowing, natural rhythm that guides the eye forward without the fixtures becoming the focal point themselves. For a standard 50-foot residential walkway, 6 to 8 path lights is typically the right count — not 20.
Uplighting Trees and Structures
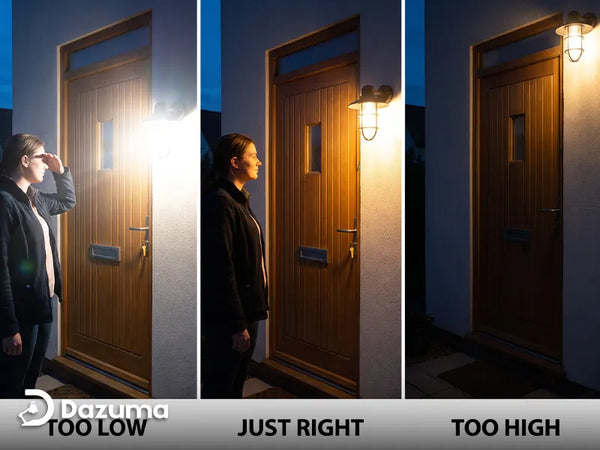
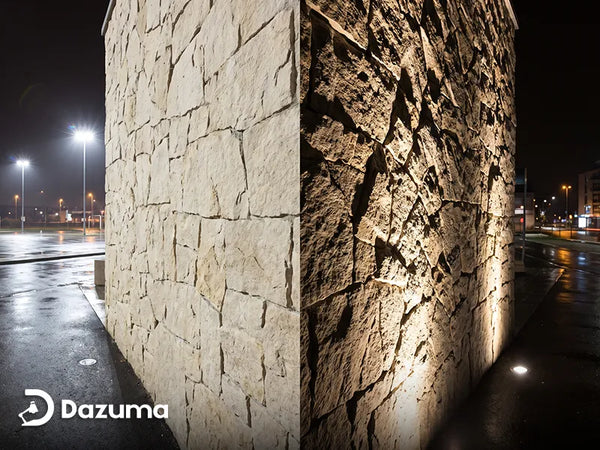
When uplighting a tree, position the fixture 1 to 3 feet from the base, angled upward at 45 to 60 degrees. For trees taller than 15 feet or with wide canopies, use two fixtures placed on opposite sides to avoid flat, one-dimensional illumination. The goal is to light the canopy and branching structure, not just the trunk. For stone or masonry walls, try grazing the fixture from a low, oblique angle — this technique catches the surface texture beautifully and creates depth that straight-on lighting simply cannot replicate.
Avoiding Glare and Light Pollution
Every fixture should be aimed with intention. Light that bleeds upward into the sky or horizontally into neighboring yards is wasted — and it undermines the focused contrast that makes landscape lighting effective. Use shielded or directional fixtures wherever possible, and always check sightlines from your main seating areas and entry points to confirm nothing shines directly into someone's eyes at seated height.
Step 5: Understand Lumens and Color Temperature

Lumens measure the total amount of visible light a fixture emits — not watts, which only measure energy consumption. For outdoor landscape lighting, more lumens is rarely better. The key is matching lumen output to the intended function and scale of each zone you're lighting.
Color temperature, measured in Kelvin (K), determines whether your light reads as warm or cool. For residential landscape lighting, the professional standard is 2700K to 3000K — a warm white that flatters plants, stone, brick, wood, and human faces equally well. Anything above 4000K (cool white or daylight) tends to look clinical and institutional in a residential outdoor setting, and should be avoided for most landscape applications.
Recommended Lumens by Application
| Application | Recommended Lumens | Notes |
|---|---|---|
| Pathway / Walkway | 40 – 100 lm | Guide movement, not flood the area |
| Garden Accent / Shrubs | 50 – 200 lm | Subtle highlight, not a spotlight effect |
| Tree Uplighting (under 15 ft) | 200 – 400 lm | 1–2 fixtures angled at 45–60° |
| Tree Uplighting (15 ft and above) | 400 – 700 lm | 2 fixtures on opposite sides |
| Driveway / Security Area | 700 – 1300 lm | Wide beam angle preferred |
| Outdoor Patio / Deck (Total Zone) | 1000 – 2000 lm | Distributed across multiple fixtures |
Step 6: Weatherproofing and IP Ratings
Every outdoor fixture you install carries an IP (Ingress Protection) rating — a standardized two-digit code that defines how well the fixture resists dust and water. The first digit (scale 0–6) rates solid particle protection; the second digit (scale 0–8) rates liquid ingress resistance. Here's what those ratings mean for landscape lighting in practice:
| IP Rating | Protection Level | Recommended For |
|---|---|---|
| IP44 | Splash-proof from any direction | Covered porches, sheltered patios |
| IP54 | Dust-resistant + splash-proof | Semi-exposed outdoor areas |
| IP65 | Fully dust-tight + water jet resistant | Path lights, spotlights, wall fixtures |
| IP67 | Temporary immersion (1m / 30 min) | In-ground well lights, irrigated garden beds |
| IP68 | Continuous submersion | Pond lighting, underwater pool fixtures |
IP65 is the minimum for any fixture in an exposed outdoor position. If your region experiences heavy rainfall, snow, or regular irrigation spray, prioritize IP65 or higher for all ground-level and exposed garden fixtures. Never install an indoor-rated fixture outside, even under a covered patio — temperature swings alone will degrade the housing over time.
Step 7: Layer Your Lighting for Maximum Impact
The single biggest difference between amateur and professional landscape lighting is layering. Just as interior designers build rooms around ambient, task, and accent lighting, outdoor spaces benefit from the same three-tier approach — and the results are dramatically more sophisticated.
Ambient Lighting provides the overall baseline brightness of the space — post lights, bollards, or broad-beam wall fixtures that keep the environment generally visible and safe.
Accent Lighting creates focal points and visual interest — uplights on trees, spotlights on sculptures or architectural elements, wall-wash fixtures that highlight textures and surfaces.
Task Lighting serves specific functional needs — path lights that help you navigate safely after dark, step lights that prevent falls, entry lights that make your front door easy to identify and approach.
A great landscape layout uses all three layers working together. It's the deliberate interplay between bright areas and intentionally dark ones that creates depth, drama, and a space that feels designed — not just lit.

Common Landscape Lighting Mistakes to Avoid
- Over-lighting everything. Uniform brightness eliminates contrast and makes a yard feel like a commercial parking lot. Let some areas stay intentionally dark — it makes the lit areas far more impactful.
- Ignoring fixture scale. A 6-inch stake light next to a 40-foot oak looks completely out of proportion. Match fixture size and output to what it's illuminating.
- Using the wrong color temperature. Cool white (5000K+) looks clean in commercial spaces, not in residential gardens. Stick to 2700K–3000K warm white for virtually all landscape applications.
- Skipping automation. A landscape lighting system with no timers, dimmers, or smart controls is a wasted opportunity. Automating your setup increases energy efficiency, extends bulb life, and makes the whole system dramatically more convenient to live with.
- Choosing fixtures without checking IP ratings. An unrated or underrated fixture installed outside will fail within a season. Invest in properly rated products from the start — it's far cheaper than replacing fixtures every year.
- Placing fixtures too close together. Overcrowding creates hotspots, overlapping beams, and a cluttered, chaotic look. More is rarely better. Space your fixtures intentionally and leave room for light to breathe.
- Forgetting maintenance access. Plan your fixture locations with future bulb replacement and cleaning in mind. In-ground fixtures and fixtures buried in dense planting beds are notoriously difficult to service if you don't account for access from the start.
Start Building Your Landscape Lighting Plan Today
A great landscape lighting layout is one of the most impactful, lasting upgrades you can make to your home — and it doesn't have to be complicated. Work through these seven steps in sequence: assess your space at night, define your zones, match fixture types to each zone, place fixtures with intention, dial in your lumen targets and color temperature, verify IP protection for every product, and layer your lighting for visual depth and drama.
By the time you reach step seven, you'll have a complete, confidence-inspiring plan — and a yard that tells a genuinely compelling story after dark.
Ready to bring your plan to life? Explore the full range of outdoor lighting fixtures at Dazuma — from precision outdoor spotlights built for tree and architectural uplighting to durable path lights engineered for years of all-weather performance. Every product in our lineup is selected for real outdoor conditions, built to hold up through the seasons, and designed to complement homes just like yours. Your perfect nighttime yard is closer than you think.