Who This Is For: This guide is for homeowners who like the dramatic texture they see on professionally lit brick or stone homes but are not sure what wall grazing is, where the fixtures should go, or whether the effect will work on their own exterior.
Why Some Outdoor Walls Look Flat After Dark
You can spend a significant amount of money on brick, stacked stone, board-formed concrete, or a slatted wood screen, then watch all that texture disappear at night. A bright porch light may illuminate the area, but it often leaves the wall looking flat. A floodlight can make the yard feel secure, yet it may wash over the surface so broadly that every shadow vanishes.
Wall grazing solves a different problem. Instead of trying to make the whole exterior evenly bright, it uses a narrow angle of light to reveal the small ridges, joints, grooves, and irregularities already present in the material. The result is not simply “more light.” It is a stronger sense of depth.
From a designer’s perspective, this is one of the most useful techniques for making a modest home feel more architectural at night. It can turn an ordinary brick chimney, entry column, courtyard wall, or stone retaining wall into a feature without adding decoration. The surface itself becomes the focal point.

Quick Answer: What Is Wall Grazing Lighting?
Wall grazing is an accent-lighting technique that places directional fixtures close to a wall so the beam travels across the surface at a sharp angle. That angle creates small shadows behind every raised brick, stone edge, mortar joint, wood slat, or architectural detail.
Outdoors, the fixtures are commonly installed near the base of the wall and aimed upward. They can also be mounted beneath an eave and aimed downward. A practical starting point is to place the light within about 12 inches of the wall, then adjust it during a nighttime test.
The closer the light is to a textured surface, the deeper and more dramatic the shadows generally become. Moving it farther away softens the texture and gradually changes the effect toward wall washing.
How Wall Grazing Creates Texture
Imagine holding a flashlight directly in front of a brick wall. The light reaches the face of each brick, but very little shadow appears. Now move the flashlight close to the wall and aim it upward. The front edges become bright while the mortar joints and areas behind each projection become darker. That contrast is what your eye reads as texture.
The fixture does not create new texture. It reveals what is already there. This distinction matters because wall grazing can make a beautiful material look exceptional, but it can also expose flaws you would rather not see.
Three Variables Control the Effect
- Distance from the wall: Closer placement usually creates deeper shadows; more setback creates a gentler effect.
- Beam angle: Narrow or controlled beams create a more focused graze. Very wide beams can spill into windows, landscaping, or the sky.
- Surface depth: Rough stone and deep mortar joints create more visible contrast than smooth painted siding.
A fixture listed under Wall Wash Lighting can sometimes create a grazing effect when positioned close to the surface and aimed correctly. Likewise, a compact spotlight can graze a wall even if its product title does not use the word “grazer.” Placement and optics matter more than the marketing label.

Distance Is Your Main Design Control
Do not treat the first installation position as permanent. A few inches can noticeably change the shadows. Test one light after dark before drilling an entire row of mounting holes.
Wall Grazing vs. Wall Washing vs. Spotlighting
These terms are often mixed together online, which leads homeowners to buy the right fixture for the wrong effect. The easiest way to separate them is to think about what you want the wall to do visually.
| Technique | Fixture Position | Visual Effect | Best Outdoor Uses |
|---|---|---|---|
| Wall Grazing | Close to the wall, often within about 12 inches | Strong highlights and shadows that emphasize texture | Brick, stacked stone, rough concrete, columns, wood slats |
| Wall Washing | Farther from the wall with a wider, blended beam | More even brightness and fewer shadows | Smooth stucco, large facades, broad courtyard walls |
| Spotlighting | Aimed at one selected feature from any practical angle | A defined pool or cone of light | House numbers, sculptures, columns, trees, decorative relief |
Wall washing is not better or worse than grazing. It solves a different problem. If your stucco is uneven from repairs or your painted siding has visible waves, a soft wash may be far more flattering. For a fuller explanation of fixture families and beam behavior, see What Is a Wall Washer Light Fixture? A Homeowners’ Guide.
Four Types of Outdoor Wall Grazing
1. Ground-Level Uplight Grazing
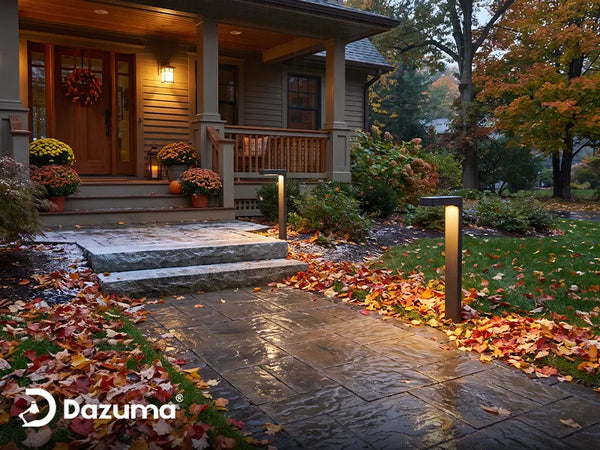
This is the most familiar residential approach. Fixtures sit in a planting bed, on paving, or near the foundation and throw light upward. It works well on stone facades, brick chimneys, retaining walls, and entry columns.
Uplighting feels dramatic because the direction is less common in daylight. It can also keep fixtures below normal sightlines, but you need to control glare for people walking toward the wall.
2. Eave-Mounted Downlight Grazing
Fixtures mounted beneath an overhang aim downward close to the wall. This can feel more natural because it resembles light falling from above. It is useful when ground-mounted fixtures would be hit by lawn equipment, buried by snow, blocked by plants, or visible from seating areas.
Down-grazing often reveals brick and siding differently than uplighting. Test both directions when the wall has deep ledges or irregular stone.
3. Continuous Linear Grazing
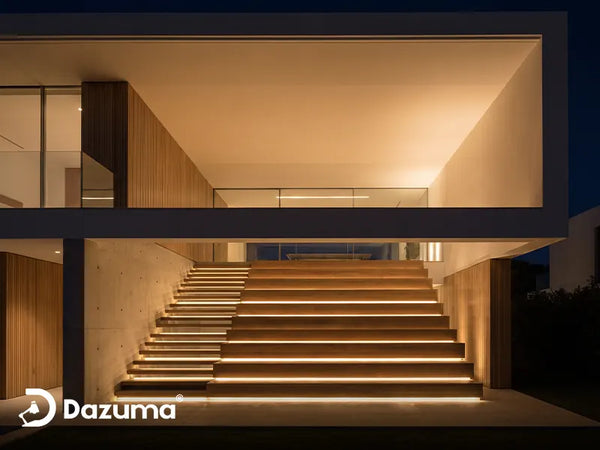
A linear fixture creates a continuous band of light along a longer wall. It is useful when you want fewer visible scallops and a more consistent effect across horizontal masonry or a modern facade. Continuous light can feel calm and architectural, though poor aiming can make it look like a bright strip rather than a textured graze.
4. Point-Source Grazing
Small directional fixtures create individual columns or overlapping pockets of light. They are easier to aim around windows, doors, plants, and wall projections. They also let you highlight selected sections instead of illuminating the entire facade.
Browse Outdoor Spotlights when you need adjustable point sources rather than one long linear fixture.
Uplighting and Downlighting Feel Different
Uplighting creates stronger drama near the base. Downlighting can feel quieter and keep ground areas clear. The wall material, roofline, plants, snow, and normal viewing angle should decide the direction.

When Should You Use Wall Grazing Outdoors?
Use It on Materials With Real Texture
Wall grazing is most rewarding on stacked stone, rough brick, deep mortar joints, fluted concrete, ribbed metal, carved panels, and wood slats. These surfaces give the light something to catch.
Use It to Strengthen an Entry
If a front entry looks impressive during the day but disappears at night, grazing one stone column or the textured wall beside the door can create a clear destination. You do not need to illuminate the entire house.
Use It to Add Depth to a Small Courtyard
A courtyard can feel like a dark box after sunset. Grazing one wall creates a layered background without filling the space with freestanding fixtures. It also gives the eye somewhere to rest beyond the furniture.
Use It on Long Retaining Walls Carefully
Long masonry walls often look heavy at night. A controlled graze can break up that mass, but you may not need continuous light from end to end. Lighting selected sections around steps, seating, or planting can feel more natural and cost less.
Skip It When the Wall Has Flaws You Want to Hide
This technique is honest—sometimes too honest. It can reveal patching, uneven paint, warped siding, lumpy stucco, and inconsistent masonry. In those cases, choose a broader wall wash or direct attention to landscaping instead.

How to Place Outdoor Wall Grazing Fixtures
Start Close, Then Adjust
Begin with a temporary position roughly 6 to 12 inches from the wall. Aim the beam along the surface rather than straight at it. Move the fixture outward in small increments until the shadow depth feels appropriate.
Test One Fixture Before Planning the Whole Row
Fixture spacing depends on beam width, wall height, surface texture, and how much overlap you want. Catalog dimensions cannot tell you exactly how the light will interact with your specific brick or stone. Set up one light after dark, mark the useful beam width on the ground, and use that real result to plan the remaining fixtures.
Watch for Scallops
Round or narrow beams can create repeated bright arches. Some rhythm is attractive on columns or a formal facade, but uneven spacing can look accidental. Linear fixtures or carefully overlapping beams create a calmer result.
Keep Light Out of Windows
A beautiful exterior effect quickly becomes annoying when light enters a bedroom or reflects off interior glass. Check the view from inside before final installation. Use shields, tighter aiming, lower output, or different mounting positions where needed.
Consider Plants at Mature Size
A fixture that works in a new planting bed may be blocked in two seasons. Leave a clear beam path and keep enough access for cleaning and aiming. Plants can soften visible fixtures, but leaves directly in front of the lens create distracting moving shadows.
If your project includes multiple facade fixtures, the installation guide on how to install wall washer lights on exterior facades covers practical planning considerations before permanent mounting.

A Nighttime Mockup Prevents Expensive Mistakes
Move one light, photograph the result, and check it from the street, front door, patio, and nearby rooms. That simple test is more useful than guessing from a daytime plan.
A Linear Fixture for a Continuous Architectural Effect
For a long stone wall or modern facade, a linear source can create a more continuous effect than a row of round spotlights. It is particularly useful when you want the texture to read as one connected surface rather than a series of separate light columns.
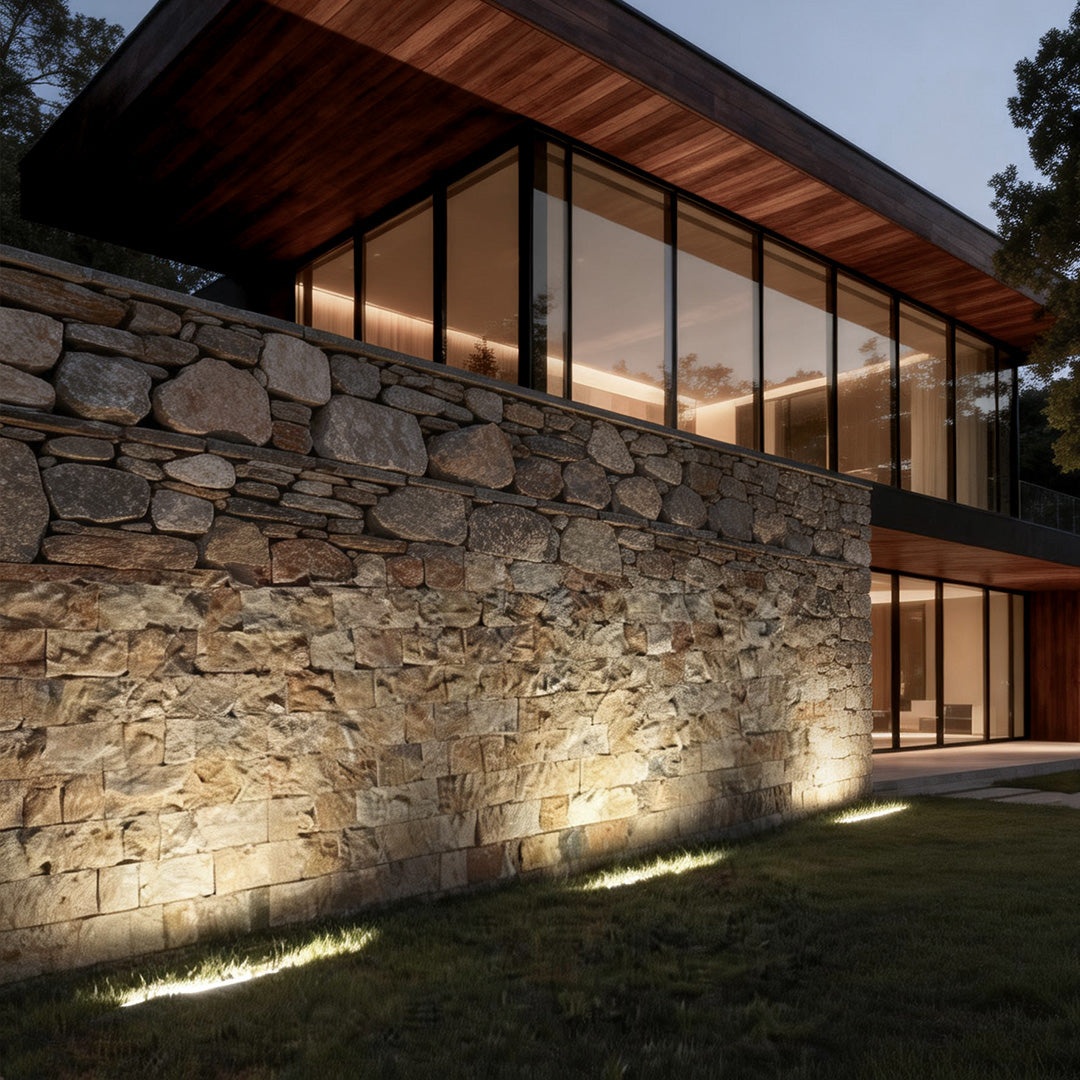
LED Building Facade Lighting Outdoor Linear Wall Washer Light
Price: $91.99
This slim linear fixture suits longer facade sections where a continuous upward line of light is easier to control than several isolated beams. The final wash-or-graze effect still depends on mounting distance and aiming.
- Gray aluminum body with an integrated LED optical system.
- Available in 3000K warm white, 6000K white, and 2000K yellow light.
- Hardwired low-voltage operation requires a separate transformer.
Choose Color Temperature Based on the Wall Material
Warm white around 2700K to 3000K usually flatters red brick, tan stone, wood, and traditional architecture. It deepens warm material tones and creates a comfortable residential atmosphere.
Neutral light around 3500K to 4500K can work with gray stone, concrete, and contemporary exteriors where you want material color to remain more neutral. Very cool 6000K light creates a crisp, high-contrast effect, but it can feel commercial on a warm brick home.
Extremely warm amber or yellow light can create a dramatic hospitality-style effect. Use it deliberately and test it against paint, stone, and nearby landscape lighting so the colors do not clash.
A Compact Spotlight for Brick Sections and Columns
A point-source fixture is often easier to aim when the wall is interrupted by windows, doors, columns, planters, or changes in material. It lets you emphasize a selected feature instead of committing to a continuous band of light.
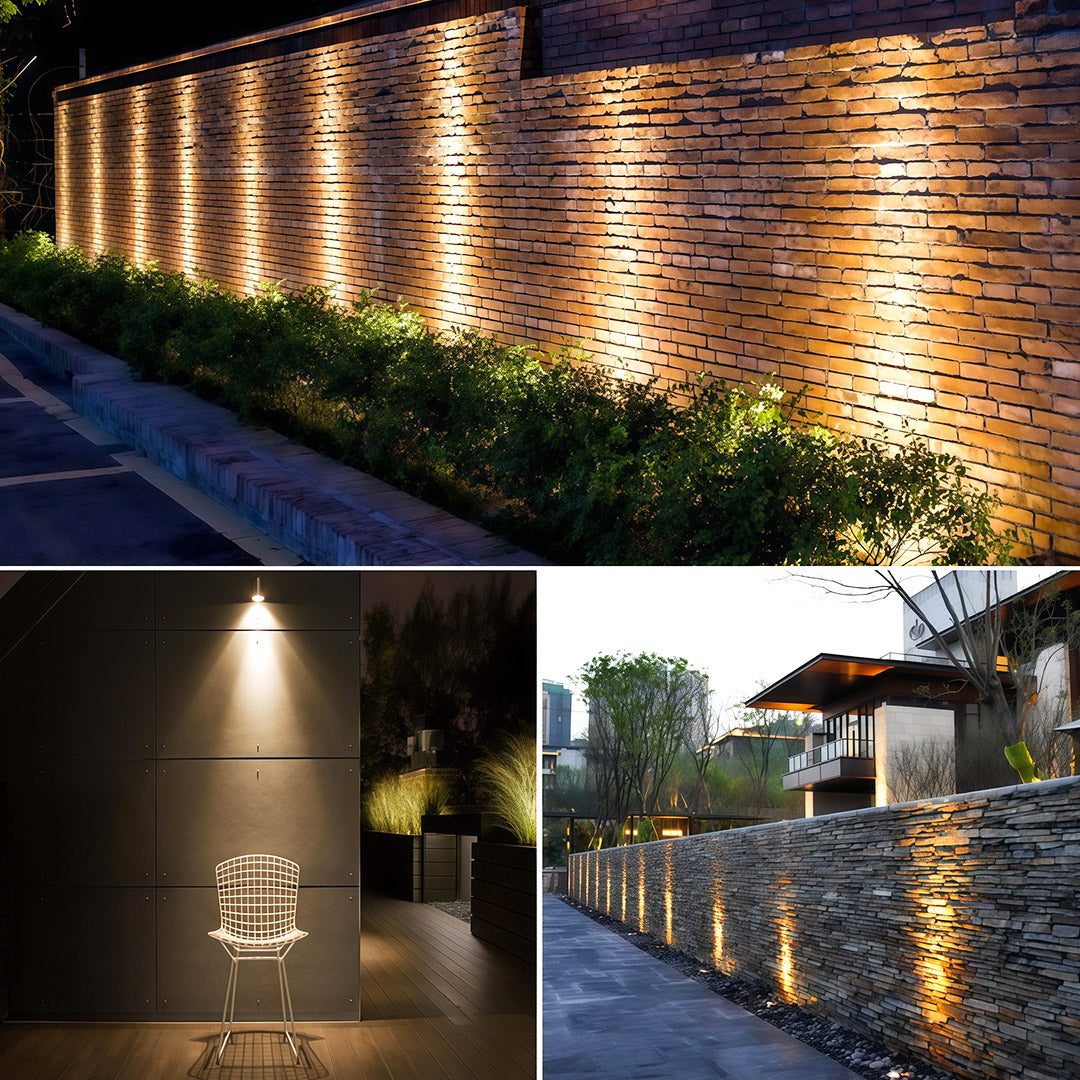
Decorative Wall Wash Lighting Outdoor LED Waterproof Spotlights
Price: $196.99
This compact directional fixture is useful for testing individual sections of brick, stone, columns, and landscape features. Multiple set quantities allow the layout to expand after the first nighttime mockup.
- Available in 3000K, 4500K, and 6000K selections.
- Offered as a single fixture or sets of 2, 4, 6, 8, and 10.
- Controlled beam works well for smaller architectural sections and focused texture.
Common Wall Grazing Mistakes
Lighting a Smooth Wall as Though It Were Stone
If the surface has little texture, close placement may reveal paint roller marks and repairs instead of creating architectural depth. Use a softer wash or move the fixture farther away.
Using Too Much Output
Brighter is not automatically better. Excessive light can destroy the subtle shadow pattern, create glare, and make the facade compete with every other outdoor feature. Start lower and add light only where needed.
Spacing Fixtures Before Testing the Beam
Manufacturer specifications help, but masonry texture, wall height, and viewing distance change the result. A nighttime mockup should determine spacing.
Ignoring the View From Inside
Check bedrooms, living rooms, and glass doors. A fixture that looks beautiful from the driveway may shine directly into the house.
Letting Plants Block the Beam
Plan for mature growth and maintenance access. Small shrubs can become large shadow-makers surprisingly quickly.
Mixing Too Many Lighting Techniques
A grazed wall, bright path lights, tree uplights, porch sconces, and floodlights can all compete. Give each technique a clear job. The broader Outdoor Lighting collection can help you compare fixture types, but the final layout should still feel selective rather than crowded.
Outdoor Wall Grazing Planning Checklist
- Confirm the wall has texture worth emphasizing.
- Identify the main viewing locations: street, driveway, patio, entry, and interior windows.
- Choose uplighting or downlighting based on glare, plants, snow, and maintenance.
- Test one fixture roughly 6–12 inches from the wall.
- Adjust beam angle before deciding fixture spacing.
- Check for window spill and glare from normal eye level.
- Compare color temperature against the actual wall material.
- Keep wiring, transformers, and connections accessible and rated for outdoor use.
- Use a qualified electrician for permanent hardwired or line-voltage work.
Final Advice: Let the Wall Decide
Wall grazing is most successful when it responds to the material instead of forcing a dramatic effect onto every surface. Rough brick, stacked stone, deep mortar, ribbed concrete, and wood slats usually reward close, directional light. Smooth siding and patched stucco often do not.
Start with one fixture, one wall section, and one nighttime test. Move the light closer and farther, adjust the angle, and view it from the places your family actually uses. That small experiment will tell you more than a perfect-looking diagram.
When the result is right, the fixture almost disappears. What you notice is the home’s texture, depth, and craftsmanship—details that were already there but had been missing after sunset.