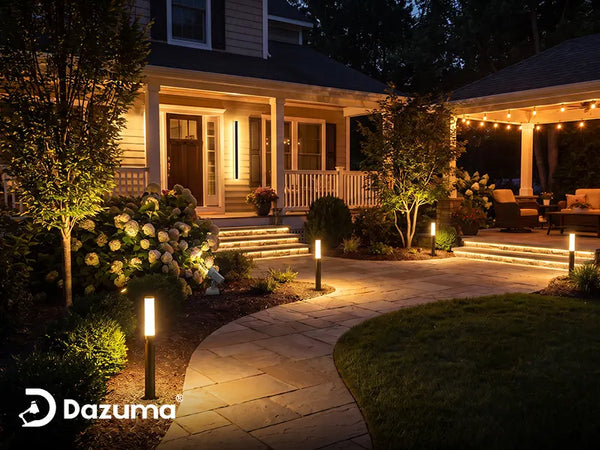
This guide is for homeowners who notice that a porch light looks different after a storm, path lights disappear under fall debris, or solar fixtures fade sooner on cold evenings. It covers what changes in the light itself, what changes on the ground, and how to inspect the setup without guessing at an electrical repair.
Introduction
Outdoor lighting is often planned on a clear evening with dry paving and tidy planting beds. Then the season changes. Rain makes dark stone reflect like glass. Leaves collect on low lenses and hide the edge of a step. Frost whitens the ground while making a shaded landing more slippery. The lights may be operating exactly as designed, yet the route feels less readable.
It helps to separate two questions: Is the fixture working safely? and Is its light still useful in this weather? A lamp can turn on while the beam is blocked, misdirected, or glaring off a wet surface. Conversely, a light that flickers after rain may need attention to its seals, connections, or supply. This guide shows how to recognize those different problems and prioritize the places people actually walk.

The Quick Answer: Recheck the Beam After the Weather Changes
After rain, inspect whether glare off paving is hiding the path and whether water has reached a fixture or connection. After leaves fall, clear lenses, solar panels, drains, step edges, and the walking surface. After frost, look for ice at the exact places people step and avoid treating brighter lighting as a substitute for removing a slippery hazard. Recheck the route from both directions after dark.
For new fixtures, choose a product marked for the actual exposure and follow its mounting instructions. An uncovered path light and a porch light under a deep roof may face different amounts of water. A wet-location marking is relevant where a fixture receives direct rain; a damp-location product belongs only where its listing and installation conditions allow it. Check the entire installation, including the power source and connections, instead of assuming that a weather-resistant lamp body makes every component suitable outdoors.
Prioritize the main walk, steps, and door before decorative accents. Well-aimed path lights should still reach the paving after plants grow or leaves settle around their bases. The purpose is to show feet the next safe surface, not merely to make a line of fixtures visible from the street.
Rain Changes the Surface Before It Damages a Light
Wet Paving Can Look Brighter but Reveal Less
A dry textured paver scatters light, making its grain and edges easier to read. Water can make the same surface smoother and more mirrorlike to the eye. A bright uplight or an exposed lamp may produce a strong reflection in a shallow puddle, while the darker portion of the path beyond it seems to disappear. At night, a person may see the glare instead of the change in level. This is one reason to judge outdoor lighting during or after real rain, not only on a sunny installation day.
Stand where guests approach from the driveway, then reverse direction. If a light reflects sharply into your eyes, try a shielded, downward-directed beam or adjust aim within the manufacturer's permitted range. Do not point a fixture into a neighbor's window or at a driver's eye level to compensate. Clear drainage problems and standing water separately; lighting cannot make a puddle or a slippery surface safe.
Moisture Can Expose a Hidden Installation Problem
A fixture that flickers only after storms, has persistent water inside its optical compartment, or trips a protective device needs more than a brighter bulb. Water can enter through a damaged seal, unsuitable enclosure, poorly protected connection, or an installation that lets runoff collect. Switch the affected circuit off if there are signs of damage, do not handle wet electrical parts, and have a qualified electrician inspect hardwired equipment or recurring faults. Do not defeat a tripping breaker or GFCI just to keep the lights on.
Do not automatically seal every opening with caulk. Some fixtures are designed with drainage or ventilation paths; blocking those can trap moisture. For a closer look at ratings, seals, mounting, and what to do when water appears inside, read how to prevent rain water from entering outdoor lights. Follow the specific fixture instructions before opening a housing or replacing a gasket.

Look at the Ground, Not the Glowing Fixture
A bright point of light can make an entry look lively from a distance while leaving the walking surface difficult to interpret. During a wet-night check, look for the curb, the first stair edge, and the next turn. If those are lost in reflection, change distribution and placement before increasing output.
Rain can also show where a fixture has been installed in the splash zone of a downspout. Redirect the runoff or reconsider the position through a proper installation; do not assume a new bulb will cure repeated exposure.
Fallen Leaves Block Light and Hide Changes in Level
A pile of leaves can cover a low fixture's lens without making the lamp fail. It can also hide a tread edge, paving gap, or solar panel. The result is easy to misdiagnose: one side of the path looks dim, so a homeowner considers a higher-output replacement, when a five-minute cleanup would restore the beam. Clear the route itself first, then the fixture surfaces, using the cleaning method recommended for the materials.
Leaves are also a placement test. A light set deep in a bed below the grade of nearby mulch may be buried every windy weekend. A fixture right where the leaf blower, rake, or snow shovel works is likely to be bumped. Set new lights far enough from the path to avoid foot traffic but high and open enough that seasonal growth and debris do not swallow the light. Verify the beam still lands on the surface, rather than raising a light so much that its source becomes glaring.
Watch Solar Panels and Dusk Sensors
A leaf on a small solar panel reduces the area receiving daylight. Leaves, dirt, and shorter days can combine to reduce the energy available for the evening, particularly in a shaded location. A photocell or dusk sensor can also behave oddly if it is shaded by a wreath, vine, or piled debris, or illuminated by a nearby light. Before replacing a solar light or controller, clean and uncover the sensing surface and observe a complete day and night cycle.
Solar lighting is convenient for movable garden accents, but check its runtime in the actual season and location before trusting it as the only light at a critical step. Compare solar path lights with the amount of direct daylight available after the trees cast their fall and winter shadows. A specification from a full-sun test is not a promise of the same result beneath a dense canopy.
Clear Both Sides of the Problem
Brush leaves away from the lens and panel, then clear them off steps and paving. Restoring a lamp without uncovering the walking surface leaves the hazard in place. Wet leaves can be especially hard to distinguish from dark pavers at night.
Inspect again after the next wind event. If one location repeatedly collects debris, move an easily repositioned fixture or redesign that small area instead of relying on daily cleanup.

Frost and Cold Change Visibility and Runtime
Frost can make a lawn or pale paving reflect more light than it did the evening before. That extra brightness may look attractive, but the shaded step beside it can appear darker by comparison. Fine ice also changes the footing even if it makes the route seem visually clear. Keep the path clear and use appropriate surface treatment; no amount of lighting removes a slip hazard.
Condensation, frost, or snow on a lens can blur the beam. A shallow marker may disappear beneath a small drift, while snow piled beside a path light can redirect its glow upward into eyes. Position fixtures where routine snow removal will not strike them, and inspect the installed height in relation to typical leaf and snow accumulation. Do not chip ice off a lens with a metal tool or pour hot water onto cold glass; follow the maker's cleaning instructions and let the fixture cool if necessary.
Solar Lights May Finish Earlier on Winter Nights
The winter effect is a combination, not simply that LEDs dislike cold. There are fewer daylight hours, the sun is lower, panels can be shaded or covered, and battery performance depends on its chemistry, temperature, age, and charge state. A light that ran until midnight in summer may stop earlier in fall or winter. Clean the panel, check exposure, and review the maker's battery and operating-temperature instructions before deciding a light has failed.
For a main entry where dependable operation matters, a properly installed wired layer may be a better foundation, with solar accents used where their seasonal performance has been tested. If a solar unit repeatedly fades despite a clean panel and adequate sun, the existing guide to solar lights that are not charging covers additional checks.

Do Not Let a Bright Lawn Mask a Dark Step
Walk from the brightest frosted area into the entrance. Your eyes may adapt to the pale ground, making a covered landing or recessed stair harder to read. A small, shielded source on the step or adjacent wall can help reveal the change in level while a large floodlight may flatten it.
Check the scene from the direction of travel. A person descending the steps sees a different set of shadows from someone approaching the house.
Weather Symptom Checklist: What to Check First
| What You Notice | Possible Weather Link | First Sensible Action |
|---|---|---|
| Light is on, but the path looks dim | Leaves, mud, snow, or plant growth block the beam | Clear the surface and lens; test after dark |
| Strong glare after rain | Wet paving reflects an exposed or upward beam | Check both approaches; shield or re-aim as permitted |
| Solar light quits earlier | Short day, shade, covered panel, or battery condition | Clean panel; check sun and battery instructions |
| Fixture flickers after rain | Possible water intrusion or connection fault | Stop using damaged equipment; arrange proper inspection |
| Breaker or GFCI trips repeatedly | Potential electrical fault, sometimes moisture-related | Leave it off and call a qualified electrician |
| Step edge disappears in frost | Bright adjacent ground and shaded tread | Treat the slippery surface; adjust step illumination |
The table separates changes in the scene from potential equipment faults. Cleaning a leaf-covered lens is routine maintenance; opening a wet junction box or repeatedly resetting a protective device is not.
Choose and Place Fixtures for the Conditions They Will Face
For the entry, consider how a shielded outdoor wall light illuminates the landing, door lock, and first step. Look at the fixture's marking for wet or damp locations and the mounting location's actual exposure, including sideways rain and roof runoff. A covered porch is not automatically dry during a wind-driven storm.
For the path, aim light at the walking surface rather than nearby shrubs alone. Leave enough separation from traffic and yard work, while ensuring low plants, fallen leaves, and snow cannot routinely hide the source. Avoid placing connectors in spots that collect standing water. For a decorative spotlight, set the beam so wet leaves or polished paving do not send glare back toward approaching guests.
Read specifications carefully when shopping. An ingress-protection number describes tested resistance to solids and water under defined conditions; it is not a blanket promise that a fixture can be submerged, installed in any orientation, or used with any connector. For U.S. installations, also check applicable location markings and the instructions for the complete product. If a description seems vague about outdoor exposure, ask for the manufacturer's installation documentation before buying.
Position for the Messy Season
Imagine a downspout overflowing, a leaf pile collecting against a border, and a snow shovel moving along the path. These ordinary events reveal vulnerable locations that look perfectly fine in summer. Small changes to fixture position and shielding can reduce maintenance without making the light more prominent.
Test a temporary position at night before committing to wiring. A beam that reaches a dry path may need a different angle to reveal its edge after rain.

A Weather-Aware Maintenance Routine
Before the Wet and Cold Season
Walk the route after dark with all normal controls operating. Note dark transitions, exposed lamps, and puddle-prone spots. In daylight, clean lenses and solar panels as instructed, trim plants, clear drainage paths, and check whether fixtures are stable. Inspect visible cords, plugs, and housings for wear without opening electrical compartments. Set timers or dusk controls for earlier sunset and confirm that the lights remain on when the route is used.
After a Storm or Leaf Drop
Clear the path, steps, and fixture faces when conditions are safe. Look for standing water around bases, broken glass, a shifted stake, or an unusual amount of moisture inside a housing. Keep hands away from damaged electrical equipment and arrange service if needed. Recheck the lighting from the driveway and the door, because wet paving can change both views.
After the First Frost or Snow
Clear ice and snow from the walking route using methods appropriate for its surface. Find any fixtures hidden by snow and avoid striking them with tools. Wipe accessible solar panels according to the product directions, then compare actual evening runtime. If an essential light is unreliable, provide a dependable alternative rather than waiting for a perfect sunny day.
The After-Dark Test That Matters
- Start where a guest parks or enters from the sidewalk, with the normal exterior lights on.
- Look ahead to the next turn, curb, step, and door; note whether the surface is visible.
- Walk back in the opposite direction to find exposed lamps and wet reflections.
- Check low lenses, solar panels, and sensors for leaves or frost without touching damaged equipment.
- Ask whether a dark spot is caused by a blocked beam, a changed surface, or a malfunction.
- Clear physical hazards first, then adjust light placement or arrange electrical service as appropriate.
Rain, leaves, and frost can make an ordinary outdoor lighting plan behave differently without changing a single switch setting. Inspect the ground and the beam together. When the fixture is intact, a cleanup or aim correction may restore useful visibility. When water, repeated flicker, or a tripping circuit points to a fault, stop using that part of the system and get it checked properly. The goal is a welcoming route that remains readable through the untidy weeks between fall and winter.