Who This Is For: This guide is for U.S. homeowners tackling landscape lighting for the first time. If you want a yard that looks great at night but have never run wire or placed a single outdoor fixture, this walkthrough covers everything you need to get started with confidence.
Key Takeaways
- Why Low Voltage Is the Right Starting Point
- How a Low Voltage System Works
- Step-by-Step Planning Guide
- Mapping Your Lighting Zones
- Choosing the Right Fixtures
- Solar vs Wired: Which Is Right for You
- Wiring Basics Every Beginner Needs to Know
- Common Beginner Mistakes to Avoid
- Recommended Products
- Build Your Landscape Lighting Plan
Why Low Voltage Is the Right Starting Point

Low voltage landscape lighting runs on 12 volts instead of standard 120-volt household current. That single difference makes it the ideal starting point for beginners. The system is safe to work with, straitage setup consists of a transformer plugged into a standard outdoor outlet, a run of 12-volt cable, and individual fixtures connected along that cable. A built-in timer or photocell handles automatic on/off so you never have to think about it after the initial setup. For areas where running cable is imprat;margin:24px 0;flex-wrap:wrap;">
The Three Core Components
Every low voltage landscapTransformer: Plugs into a standard outdoor GFCI outlet and steps 120V household power down to safe 12V output. Most transformers have built-in timers, photocells, and multiple circuit zones. Choose one rated for at least 20% more wattage than yonductor low voltage wire runs from the transformer out to your fixtures. Common gauges are 12-gauge for longer runs and heavier loads, and 14-gauge for shorter runs with fewer fixtures.
Fixtures: Path lights, spotlights, bollards, and accent lights connect to the cable using simple snap-on connector clips. No wire stripping or special tools required for most modern systems.How the Power Flows
The transformer converts power and sends it down the cable. Each fixture taps into the cable at its location. A timer or photocell at the transformer turns the whole system on at dusk and off at a set time — fully automatic once installed.

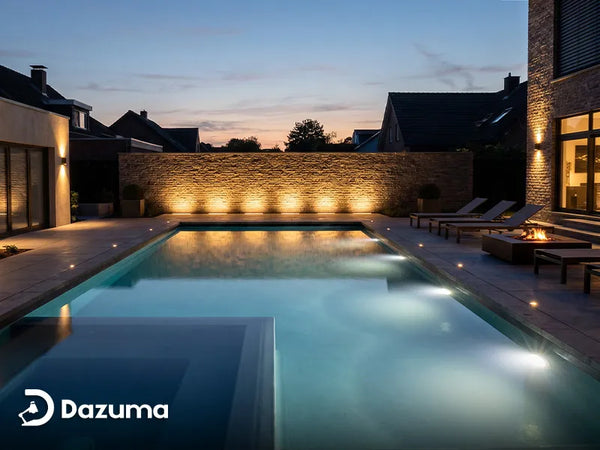
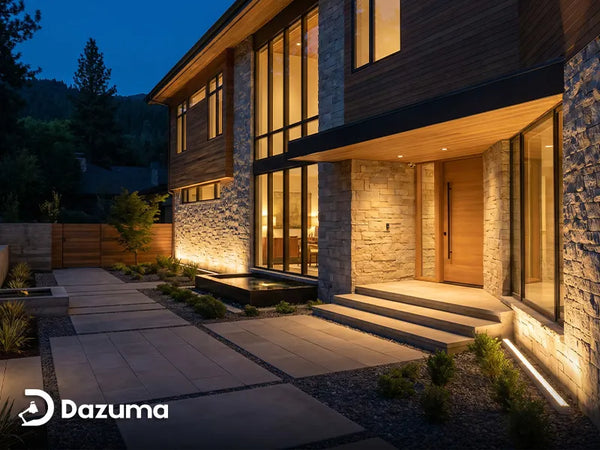
Thinking in zones rather than individual fixtures is the single most useful habit a beginner can develop. Each zone has a different purpose, a different required brightness level, and calls for specific fixture types.
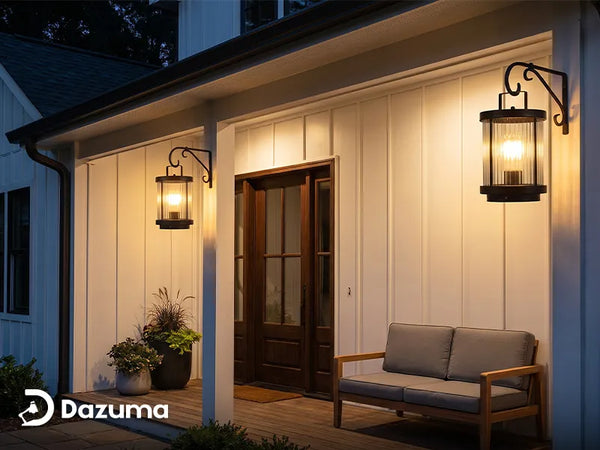
| Zone | Primary Purpose | Patio and Living Area | Ambiance, entertaining | Wall lights, string lights, step lights | 2700K–3000K |
|---|---|---|---|---|---|
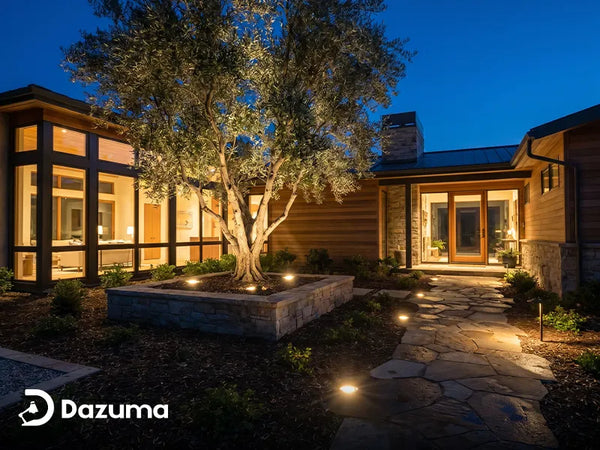
| Garden Beds and Trees | Accent, drama | Spotlights, uplights, ground stakes | 3000K–3500K | ||
| Pathways and Side Yards | Navigation, safety | Bollard lights, stake lights | 3000K–3500K | ||
| Perimeter and Security | Security, visibility | Motion-activated wall lights, flood lights | 3000K–4000K |
For a deeper breakdown of how to approach each zone, see our guide on How to Design Landscape Lighting: Enhancing Outdoor Ambience.
Choosing the Right Fixtures

Four Questions to Ask Before Buying Any Fixture
- What IP rating does it carry? IP44 for covered patios and protected entries. IP65 for open outdoor areas exposed to rain. IP67 for ground-level fixtures that may contact standing water or irrigation spray.
- What material is the housing? Cast aluminum and stainless steel last longest outdoors. Avoid thin plastic housing for permanent installations — UV exposure causes brittleness and cracking within a few seasons.
- What beam angle do you need? Narrow (15–25°) for trees and focal points where precision matters. Wi45–60°) for path lighting and broad area coverage.
- What color temperature fits the zone? 2700K–3000K for warm, welcoming areas like entries and patios. 3000K–3500K for garden beds and pathways where visibility matters alongside ambiance.
Browse Dazuma's Outdoor Lighting and Path Lights collections for fixtures built to residential landscape standards.
Solar vs Wired: Which Is Right for You
Both solar and low voltage wired systems have a place in a well-planned landscape. Understanding the tradeoffs helps you decide which to use where — and many homeowners end up using both.
| Factor | Low Voltage Wired | Solar |
|---|---|---|
| Installation effort | Moderate — cable routing required | Very easy — stake and done |
| Output consistency | Reliable year-round | Varies by sun exposure and season |
| Running cost | Low (LED uses minimal power) | Zero operating cost |
| Placement flexibility | Limited by cable run distance | Place anywhere with sun access |
| Best use case | Primary lighting for key zones | Accent lighting, remote or hard-to-wire areas |
| Feature options | Full range of fixture types | Growing range including RGB color options |
Solar RGB spotlights are a particularly flexible option for accent lighting trees and garden features — they require zero wiring and many models offer color-changing modes for seasonal decoration. They work best in spots that receive at least 6 hours of direct sun daily.
For a detailed head-to-head comparison, read Solar vs Wired Outdoor Lights: Which One Is Right For Your Home?
Wiring Basics Every Beginner Needs to Know
Daisy Chain vs Hub Layout
Beginners typically connect fixtures in a single line running from the transformer out to the last fixture — this is called a daisy chain. It is the simplest approach but causes voltage drop problems on longer runs. Fixtures at the far end receive less than the full 12V and appear noticeably dimmer than those closer to the transformer.
A better approach for larger installations is the hub layout: run a single heavy-gauge cable from the transformer to a central point in the yard, then branch out shorter runs to each zone. This keeps all individual runs short and voltage consistent across the whole system.
Making Connections
Most modern low voltage landscape lighting uses quick-connect wire taps — a small clamp that pierces the cable insulation when snapped shut, making electrical contact without stripping wire. Press the fixture connector onto the cable at the desired location, close the clamp, and the connection is made. A basic front yard installation can be connected in a single afternoon.
Cable Gauge Reference
| Run Length | Recommended Gauge | Max Load |
|---|---|---|
| Under 50 feet | 16-gauge | Up to 150W |
| 50–100 feet | 14-gauge | Up to 200W |
| 100–150 feet | 12-gauge | Up to 250W |
For a complete wiring walkthrough including burial depth and connection methods, see How To Wire Low Voltage Landscape Lighting.
Common Beginner Mistakes to Avoid
- Buying too many fixtures upfront. Start with fewer than you think you need. Overbuying leads to over-lighting, which kills the atmosphere you are trying to create.
- Ignoring voltage drop. Long single cable runs cause fixtures at the far end to appear noticeably dimmer. Use the hub layout or upgrade to heavier gauge wire for runs over 50 feet.
- Over-lighting the yard. Intentional placement with some areas left in shadow creates more visual depth and interest than flooding everything with light.
- Mixing color temperatures carelessly. Putting 2700K warm lights on the patio next to 5000K cool-white security lights creates a jarring disconnect. Stay within a 500K range across connected zones.
- Skipping the night test. Always test fixture placement with temporary stakes before running any cable. It is much easier to move a stake than to re-route buried wire.
- Under-sizing the transformer. A maxed-out transformer runs hot and fails early. Choose one rated for at least 20% more than your current total fixture wattage.
- Placing solar lights in shaded spots. Solar fixtures need 6 or more hours of direct sun to charge fully. Placing them under tree canopies or in north-facing spots leads to disappointing output, especially in winter.
Recommended Products

Waterproof RGB Outdoor Solar Spot Light
Best For: Solar-powered accent lighting for trees, garden beds, and areas where running wire is not practical
| Power Supply | Light Source | RGB LED |
| Waterproof | Yes | |
| Application | Outdoor Landscape / Accent |

Unique Outdoor Spotlight Tree and Landscape Ground Light
Best For: Ground-level accent and tree uplighting for landscape focal points, garden beds, and decorative lawn features
| Light Source | LED |
| Install Type | Ground / Lawn Stake |
| Application | Landscape, Tree, Decorative Lawn |
Build Your Landscape Lighting Plan
Low voltage landscape lighting is one of the most beginner-friendly home improvement projects you can take on. The components are affordable, the installation is safe, and the results are immediately visible. Start with a sketch, pick two or three zones to light first, and test before you commit to any cable runs. Expand one zone at a time as your confidence and your vision grow.
Explore Dazuma's full outdoor lighting range to find the right fixtures for every zone: Outdoor Solar Lights, Path Lights, Outdoor Lighting, and Outdoor Wall Lighting.