Who This Is For: This guide is for homeowners who want their porch lights, pathway lights, garden lights, string lights, or security lighting to turn on and off automatically without leaving the whole exterior lit all night.

Quick Answer: What Is The Best Way To Set Up Outdoor Timer Lighting?
The easiest way to set up outdoor timer lighting is to divide your lights by purpose first, then choose the timer type for each zone. Entry lights may need a dependable dusk-to-bedtime schedule. Pathway lights usually work best from sunset to late evening. Decorative garden or patio lights may only need to run during the hours you actually use the space. Security lights often work better with motion sensors, or with a timer plus motion control, instead of staying on at full brightness all night.
For plug-in outdoor lights, use an outdoor-rated timer plugged into a GFCI-protected outdoor outlet. For low-voltage landscape lighting, the cleanest option is usually a transformer with a built-in timer, photocell, or astronomical schedule. For hardwired fixtures, such as porch sconces or exterior wall lights, a wall timer, smart switch, or professionally installed control is usually the better route.
The goal is not simply to automate lights. The real goal is to make your home look lived-in, make walking areas easier to navigate, reduce wasted energy, and avoid the harsh look of lights that stay on longer than needed. If you are still planning the fixtures themselves, start with a broad Outdoor Lighting layout, then build your timer plan around the zones you actually use.
Choose The Right Outdoor Lighting Timer
Outdoor timer lighting can be controlled in several ways. The right choice depends on whether your lights are plug-in, low-voltage, solar, or hardwired. A timer that works perfectly for patio string lights may not be the right choice for a hardwired front porch fixture.
| Timer Type | Best For | Main Advantage | Watch Out For |
|---|---|---|---|
| Outdoor Plug-In Timer | String lights, plug-in patio lights, seasonal lights | Simple and affordable | Must be outdoor-rated and matched to the load |
| Transformer Timer | Low-voltage landscape lighting | Keeps controls inside the landscape lighting system | Transformer capacity and wiring still matter |
| Astronomical Timer | Year-round porch and landscape lighting | Adjusts with seasonal sunset and sunrise changes | Needs correct location, time zone, and date settings |
| Smart Outdoor Plug Or Switch | App-based schedules and routines | Easy seasonal edits and away-mode routines | Wi-Fi range and weather protection must be reliable |
| Photocell Or Dusk-To-Dawn Control | Lights that should react to natural darkness | Turns on automatically when daylight fades | May stay on too long unless paired with a cutoff time |

Plug-In Timers Are Best For Temporary Or Flexible Lighting
A plug-in timer is useful when your outdoor lights already plug into an exterior receptacle. It works well for patio string lights, seasonal décor, or a small seating area where you want lights to come on at sunset and shut off before bedtime. The timer should be labeled for outdoor use, placed where water does not pool, and protected by a proper outdoor outlet cover.
Use A Transformer Timer For Low-Voltage Landscape Lighting
Low-voltage landscape lighting is a little different from a simple plug-in light. Most systems use a transformer that converts household voltage to lower voltage for the fixtures. If your transformer has a built-in timer, that is usually the cleanest control point. If you use an external plug-in timer with a transformer, make sure the transformer manufacturer allows it and that the timer can handle the load. Do not cut into landscape lighting wires to add a timer unless the component is specifically designed for that use.
This is also where planning pays off. If your yard has multiple lighting zones, such as front path, garden beds, wall wash lights, and patio lights, one timer may not be enough. A path that guests use every evening should not necessarily follow the same schedule as decorative tree lighting that only needs to run during dinner outside.
Photocells, Astronomical Timers, And Smart Controls Are Not The Same
A photocell reacts to light. It turns lights on when the area becomes dark and turns them off when daylight returns. An astronomical timer uses your location and date to estimate sunset and sunrise, then follows a clock-based schedule. A smart timer or smart switch uses an app, and may also support sunset triggers, voice assistants, vacation routines, and multiple schedules.
For many homes, the best setup is a hybrid: sunset on, fixed time off. That gives you the seasonal convenience of automatic evening activation without leaving lights on until dawn. If you want fixtures that naturally support this behavior, Dusk To Dawn Outdoor Wall Lights can be worth comparing with separate timer controls.
How To Set Up Outdoor Timer Lighting Step By Step
Before you touch the timer, write down which lights you want to control. This sounds basic, but it prevents a common mistake: putting too many unrelated lights on the same schedule. A front entry, side gate, garden path, and patio dining area may all be outdoors, but they do not serve the same job.
Step 1: Map The Lighting Zones
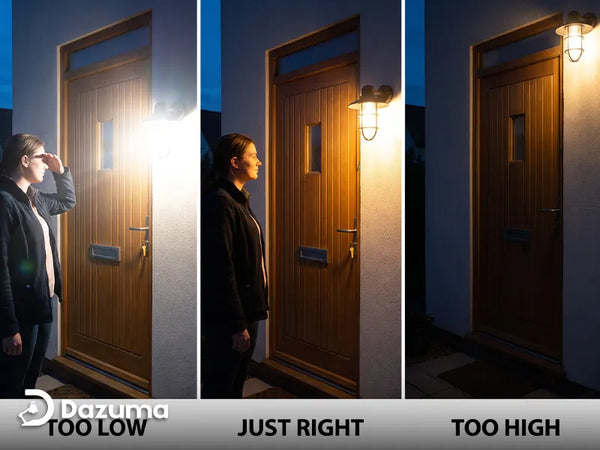
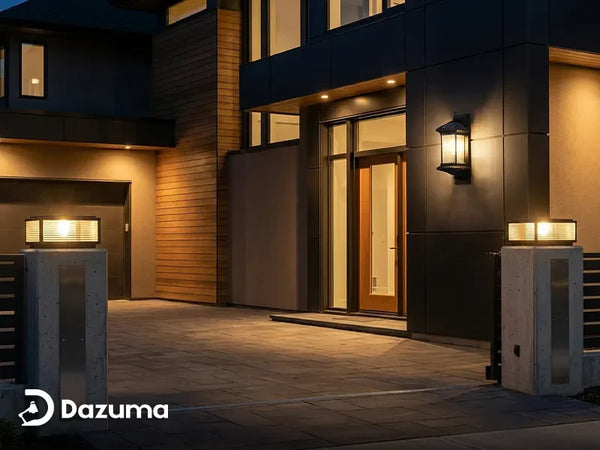
Walk outside at dusk and look at the home from the street, driveway, and main walking paths. Mark the lights by purpose: entry, navigation, accent, patio, safety, and security. Entry lighting helps people find the door. Path lighting helps people move. Accent lighting gives the yard depth. Security lighting should support visibility without blasting into windows or neighboring yards.
For path and garden zones, smaller fixtures often look better on a restrained schedule. You might run Path Lights from sunset to 11 p.m., then leave only essential entry lights active later in the night. This keeps the property welcoming without making every bed and walkway glow until morning.
Step 2: Check The Power Source
Look at how each group of lights receives power. Plug-in lights can usually use an outdoor plug-in timer. Low-voltage lights may use a transformer timer. Hardwired fixtures usually need a wall timer, smart switch, or electrician-installed control. Solar lights often have built-in sensors, so adding a separate timer may not be possible or necessary.

Step 3: Match The Timer To The Load
Every timer has a maximum rating. Check the wattage or amperage of the lights it will control, then stay comfortably below the timer rating. LED outdoor lighting usually draws less power than older incandescent lighting, but it is still worth doing the math. Do not assume a timer is safe for a full run of lights just because the plug fits.
For a low-voltage system, check the transformer capacity too. If the fixtures draw more than the transformer can support, a timer will not solve the problem. It may simply make the overloaded system turn on and off automatically. A stable setup begins with the right electrical capacity, then adds timing control.
Step 4: Program A Realistic First Schedule
Start simple. A practical first schedule is sunset to 10:30 or 11:00 p.m. for decorative and path lighting, and sunset to sunrise only for lights that truly need overnight operation. If the timer does not support sunset triggers, choose a fixed time and adjust seasonally. In many U.S. homes, summer and winter sunset can differ by several hours, so a fixed 6 p.m. schedule will feel early in summer and late in winter.
If you are still debating whether lights should stay on overnight, the guide Should I Leave Outdoor Lights On All Night? is a helpful companion topic. For many homes, overnight lighting should be selective rather than total.
Step 5: Test The System For Three Evenings
Do not judge the timer after one night. Test it for at least three evenings. Watch whether the lights turn on too early, shut off before you finish using the space, shine into windows, or leave dark gaps along steps and gates. Timer lighting is not a “set once and forget forever” project. It is more like tuning a thermostat: a few small adjustments make the home feel noticeably better.
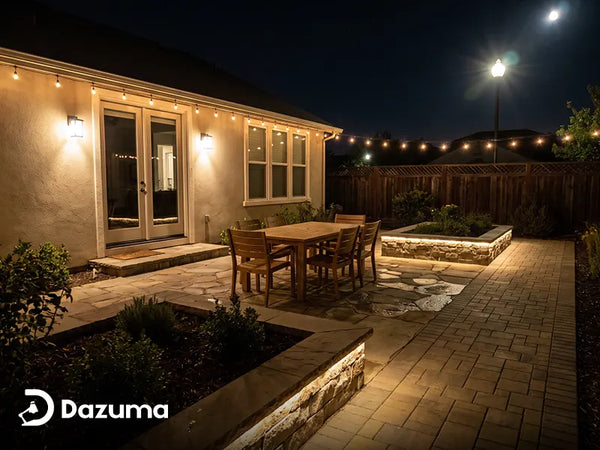
Best Timer Schedules By Outdoor Zone
A good outdoor timer schedule should match how the space is used. The front door does not need the same schedule as a garden wall, and a weekend patio routine may be different from a weekday routine.
| Outdoor Zone | Suggested Schedule | Reason |
|---|---|---|
| Front Porch Or Entry | Sunset to midnight, or sunset to sunrise at low brightness | Supports arrivals, deliveries, and basic visibility |
| Pathways And Steps | Sunset to 10:30 or 11 p.m. | Covers the most common walking hours without overlighting |
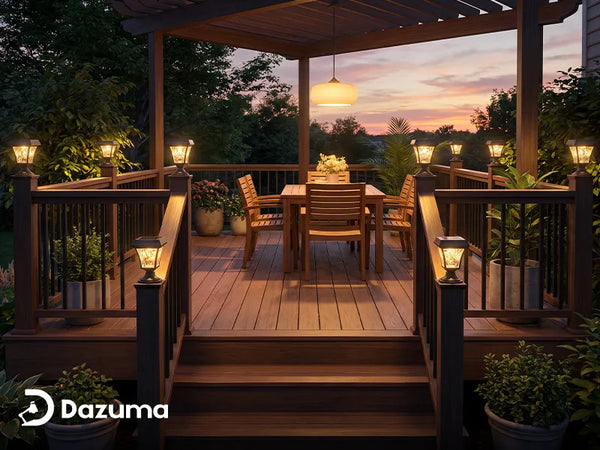
| Patio Or Deck | Evening use hours, with weekend extension | Keeps entertaining spaces ready without wasting power |
| Garden Accent Lights | Sunset to 10 p.m. | Creates curb appeal during visible hours |
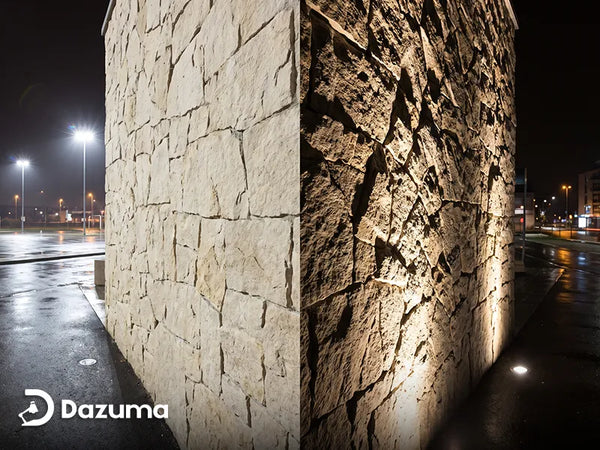
| Security Areas | Motion sensor, or dim overnight plus motion boost | Improves awareness without constant glare |

Make Weekend And Weekday Schedules Different
Smart timers and app-based outdoor plugs make this especially easy. A patio may need lights until 11 p.m. on Saturday, but only until 9:30 p.m. on weeknights. A fixed mechanical timer can still work, but it will be less flexible. The more your outdoor routine changes, the more useful a programmable or smart timer becomes.
For households that use work-from-home routines, lighting automation can also connect indoor and outdoor habits. For example, an evening routine might turn off task lighting in a home office and turn on the front entry and path lighting. If you are planning those indoor work zones too, the Office Lighting collection can help keep interior work light separate from evening exterior light.
Use Timers With Sensors Instead Of Against Them
Timers and sensors do different jobs. A timer controls when a light is allowed to operate. A motion sensor responds to movement. A photocell responds to darkness. For security areas, the best result may be a timer that enables the fixture during nighttime hours, plus a motion sensor that raises brightness only when someone approaches. That feels more intentional than one bright floodlight shining all night.
If you are comparing these control methods, the article Motion Sensor vs Timer Outdoor Lights: Pros and Cons explains where each approach makes the most sense.
Outdoor Timer Lighting Safety Checks
Outdoor lighting is exposed to moisture, temperature swings, wind, insects, soil, and accidental impact. A timer setup should not make the system more vulnerable. Before you rely on the timer, check the basics.
Keep Connections Protected From Weather
Use outdoor-rated timers, cords, and fixtures. Keep plugs off wet ground, away from puddles, and protected by weather-appropriate outlet covers. If a connection looks exposed, loose, cracked, or corroded, fix that before programming the timer. Automation should never hide a weak connection.
- Use outdoor-rated equipment only. Indoor timers and cords are not built for exterior moisture and temperature changes.
- Use GFCI protection. Outdoor receptacles should be GFCI protected, and plug-in lighting should not bypass that protection.
- Check the load rating. Add up the lights controlled by the timer and stay within the timer and circuit limits.
- Avoid permanent extension-cord setups. If the lights need year-round power, consider a proper outlet or hardwired installation.
- Do not bury or pinch cords. Keep temporary cords visible, dry, and away from door gaps, sharp edges, and high-traffic paths.
- Hire an electrician for hardwired controls. Wall timers and smart switches may require neutral wires, weather-rated boxes, and local code compliance.
Waterproofing is especially important where timers meet plugs, transformers, or splices. For a deeper look at connection protection, see How to Waterproof Outdoor Lighting Connections.
Common Timer Lighting Mistakes
The most common timer lighting problems are not complicated. They usually come from mismatched equipment, over-broad schedules, or controls placed in the wrong location.
Mistake 1: Putting Every Outdoor Light On One Schedule
This is easy, but rarely ideal. A whole-yard schedule can make the property look flat and waste power. Instead, separate essential lights from decorative lights. Let the entry stay active longer. Let the garden accents shut off earlier. Let motion lighting handle late-night activity.
Mistake 2: Forgetting Seasonal Sunset Changes
A fixed timer may need adjustment several times per year. If you do not want to reset it, choose an astronomical timer or smart schedule that follows sunset. This is one of the biggest upgrades for homeowners who dislike adjusting timers after daylight saving changes or seasonal shifts.
Mistake 3: Making Security Lighting Too Bright
Outdoor timer lighting should make the home feel safer, not harsher. A bright fixture that shines into windows or across a property line can create glare and annoyance. Aim light downward, use appropriate brightness, and consider motion boost instead of full overnight brightness.

Mistake 4: Using A Timer To Solve A Fixture Problem
A timer cannot fix the wrong fixture. If a light is too bright, aimed poorly, not outdoor-rated, or placed too close to a window, automation will only make that problem repeat every night. Fix fixture placement and brightness first, then use the timer to control when the light runs.
Mistake 5: Ignoring Manual Control
Even the best timer should have an easy override. You may need extra light during a late delivery, storm cleanup, outdoor dinner, or early morning departure. Smart timers make this simple through an app, but even mechanical and digital timers often include manual on/off modes. Make sure everyone in the household knows how to override the schedule without unplugging the whole system.
Final Advice: Build A Timer Plan Around Real Life
The best outdoor timer lighting setup is not the most complicated one. It is the one that matches your evenings. Start with the zones you actually use: front door, path, driveway, patio, garden, side yard, and security areas. Choose the timer type based on the power source. Set a modest first schedule. Then watch the home at night and adjust.
For many homes, the strongest setup is simple: porch and path lights from sunset to late evening, garden accents during visible evening hours, and motion-based security lighting overnight. That combination feels welcoming, saves energy compared with all-night decorative lighting, and gives the home a more finished appearance after dark.
If you are planning a larger lighting update, choose fixtures and controls together. A beautiful fixture with the wrong timer can feel inconvenient. A smart timer paired with the wrong brightness can still feel harsh. The right system should quietly support your routine, not make you think about lighting every evening.